Quantcast
Channel: Outback Nerf
Viewing all 347 articles
Browse latest View live

Announcing Giveaway Winners!

$
0
0
We received 6 entries in total, 3 in each Australian category. There wasn't a single International entry so naturally noone won that category.
For the First Australian category for the Modulus, the winner was OpponentMocha6.
For the Second Australian category for the Hammershot and MTB motors, the winner was Harrison Gibson.
Congratulations to the winners and thanks to all entrants! You can find the images they submitted in the rest of the post.


OpponentMocha6, credit to ThatRussianMerc
Conker
Tigerfoam (1)

Tigerfoam (2)
Darren Bui
ThatRussianMerc
Harrison Gibson


MHvZ Game Report 19/11/16 - Rhino-Fire Usage, Blind Bomber Return

$
0
0
We had quite a good MHvZ event today, a good turnout and some good games. I also got some use out of my newly completed Rhino-Fire.

Gamemodes:
Regular:
  • (Regular) Survival - Standard HvZ gametype, humans try to survive for a given amount of time (or until the last human falls). Zombies are given access to upgrades at various times, we used Infectors at 5 minutes, Tanks at 10 minutes and Husk at 15 minutes. Last human to fall wins. 
  • Secret VIP - There are 3 special players in this game: the VIP, the General and the Traitor. The VIP is a human who the other humans are trying to protect and is restricted to a given area (we used the usual tambark area), while the Traitor is a zombie masquerading as a human. When stunned, zombies must move outside of the VIP's area before counting down their stun. The only person who knows the VIP's identity is the General, while all original zombies know the Traitor's identity. Everyone knows the identity of the General, making them the only guaranteed trustworthy human. The Traitor acts as a human, but can at any point do a single Traitor zombie tag, revealing that they are the Traitor, and thus turning into a regular zombie. Additionally, if a human hits another human, the hit human is stunned as if they were a zombie, however they can still fire their blaster. If the humans protect the VIP for a given period of time (e.g. 15 minutes), the humans win. If the zombies successfully tag the VIP, the zombies win. Zombie upgrades are unlocked on a timer like Survival, with Infectors available from the start, 5 minutes for Tanks and 10 minutes for Husk. If a human is hit by a grenade, they are instantly turned into a zombie. This is the only way to actively eliminate the Traitor.
  • Defence Survival - The three zombie upgrades of Infector, Tank and Husk are spread throughout three separated squares, about 2m wide. Zombies can pick up the upgrades if they touch the desired upgrade inside the squares. If a zombie is stunned within a square, they must move outside of the square before counting down their stun. Zombies are only allowed one upgrade at a time.
New/Altered:
  • Hostage Survival - Three humans are selected as "Hostages". These Hostages have their hands bound, and abide by some special rules. Each hostage is given a grenade, but cannot use or pass it. The humans can choose to "free" a Hostage, removing their binds and allowing them to be a fully functioning human player, and granting use of the grenade they are holding. If a hostage is tagged while still bound, the grenade they are holding is removed from the game. One of the Hostages is (supposedly) a Traitor, who operates on the same rules as the Secret VIP Traitor, and can use their Traitor tag while still bound (this of course unbinds them and turns them into a regular zombie). As such, the same human vs human combat system is implemented, a human hit by a dart is stunned as if they were a zombie, but can still fire. The zombie upgrades are made available the same as in regular Survival.
  • Blind Bomber - one human is designated as the Blind Bomber, and is the only human who can carry the bomb. The humans start in the bottom corner of the play area. They must first take the bomb to the first point, at which the bomb is "armed" for 5 minutes. Once fully armed, the bomb must be taken to the second point, at which the bomb is "planted" for 5 minutes. Once that 5 minutes has elapsed, the humans win. If the bomb is moved during either timed phase, the timer is paused and only resumes when the bomb is returned. The objective of the zombies is to take the bomb to the edge of the play area. All zombies can carry the bomb, but cannot throw it. If the Blind Bomber is tagged by a zombie, they must drop the bomb, wait for a count of 5, then can try to pick up the bomb again. If a zombie is hit while carrying the bomb, they must drop it. Zombies respawn at any tree (that is not being used as a point) with a count of 15. Zombies start with Infectors, get Tanks as soon as the Blind Bomber reaches the first point, and get the Husk as soon as the Blind Bomber reaches the second point.
Zombie rules:
Zombies tag humans with their hands onto any body part, blaster, tactical gear, etc, turning the human into a zombie. If a human hits a zombie with a dart, the zombie is stunned for a count of 25. A human can also stun a zombie with melee, but only with a direct hit to the back.

There are 3 standard zombie upgrades/mutations/perks: 

  • Infector - zombies get to use foam swords, pool noodles, etc. Tags with said foam melee weapons on humans count as regular tags. Said melee weapons can also be used to block darts. 
  • Tank - zombies get to use shields, which block darts. The shields cannot be used to tag humans, presumably as a precaution against shieldbashing which could cause significant injury. 
  • Husk - a zombie gets to use a ranged attack, in this case a Vortex Mega Howler. A ranged Husk attack counts as a regular zombie tag. Husk ammo can be picked up by any zombie, but can only be used by the Husk naturally. The Husk may move from the place they were stunned to retrieve their ammo, but do not count down their stun timer until they return to their original stun place.
Zombie upgrades cannot be stacked, so a zombie can only have one upgrade at any time.
If in play, grenades can stun a zombie with a hit to any equipment, including swords and shields, and can be reused at will. If human vs human rules are in effect, a grenade hit to a human will turn that human into a zombie immediately.

Blasters:
Since there were a lot of different blasters there, I've generalised them and only listed down the ones that I saw as significant or noteworthy, or remember for that matter. Being that I can't be everywhere at once, it's entirely possible I completely missed some blasters.
Recurring/Regulars: 
Elite Retaliator (various internal setups, pump grips) - there were a wide variety of Retals present, including multiple actually without pump grips. Regardless of the setup though, a Retal is always a solid blaster. Stock ones perform noticeably better than most other stock Elite blasters, while spring upgraded ones (usually with pump grips) perform very well at mid-range with decent ROF.
ZS Slingfire (stock)- a fun, stylistically appropriate option that with practice can be used reasonably effectively at close range. It's main advantage is being a mag-fed springer that, with practice, is one-handable. In every other respect however, it is inferior to a pump action blaster such as a pump gripped Retaliator, even with upgrade springs.

Elite Stryfe (various motors, LiPos) - solid all-round flywheelers. Highly effective at close to mid-range, and relatively easy to build and control. A great blaster all round.

Elite Rapidstrike (various motors, LiPos) - high ROF flywheelers exceptional at close range and volume of fire. A lot harder to build and control than a Stryfe, and requires a fair bit of practice to master, but is a lot of fun and can be devastatingly effective in the right hands.

Buzz Bee Sentinel (various springs) - decent springers notable for their high power out-of-box. A lot less comfortable to use than Slingfires, but make up for it with raw power, being able to easily keep up with Retaliators and the like. ROF is of course the main weakness of the Sentinel, but it is still fairly effective at mid range.

Elite Alpha Trooper (various springs) - solid entry-level springer, with out-of-box pump action. EATs are noticeably weaker than other Retaloids, however the out-of-box pump action, with a vertical magwell, make it a decent all-round springer in a pinch.

ZS Sledgefire (upgrade spring, singled) - a high power springer capable of quite accurate mid to long-range support fire with the right darts. With Kooshes however, it tends to be too inaccurate and inconsistent to be effective. Being a single-shot blaster also really doesn't help in HvZ, where close-range is the primary engagement range.

ZS Longshot (upgrade spring, pump grip) - a high power springer that is capable of mid to long-range support fire. Unlike the Sledgefire, the Longshot's use of mags keeps it viable even without ideal darts, and a pump grip helps to bring its ROF up to more usable levels. It's still sorely lacking in ROF for close quarters, but it packs a punch and works best supporting other humans.
Elite Rampage (upgrade spring) - behaves essentially like the EAT, a solid out-of-box pump action springer. It does have a few differences, in particular its vertical pump grip, side magwell and slightly superior performance compared to the EAT. Which one is better comes down primarily to personal preference.

New/Infrequent:

N-Strike/Elite Rayvens(various motors, LiPos) - essentially Stryfes that are a little less efficient. A well built Rayven is still perfectly viable at HvZ, but Stryfes are a little easier to set up and perform slightly better.
N-Strike Magstrike (stock) - a relic of a time when Rapidstrikes did not exist, a working Magstrike provides the same sort of high ROF that is exceptionally effective in close range. Being an air blaster though, it has to be pumped up frequently, and it can only use its own proprietary 10 dart clips. As a result, although Magstrikes are great fun to use, practically speaking they are far inferior to a well built Rapidstrike.
N-Strike Modulus (Banshee motors, 2S LiPo) - performed essentially like a Stryfe. This is the giveaway Modulus, and is now in the hands of its new owner.
Elite Rhino-Fire (MTB Honey Badger on pusher, 3S LiPo) - I used it for short periods of time. It was a lot of fun to use when it worked, however had pretty poor range and accuracy, making it very difficult to actually use effectively. It was was very picky about mags however, and often refused to fire newly replaced mags without a bit of pusher jiggling. It was an absolute pain to lug around due to its size and side magwells, but was a heap of fun when set up on the ground. I might bring it to HvZ again some time just for fun, but it's definitely not something I'll get into a habit of bringing along.

We used the same play area as always, a triangular area with a couple of (now heavily leafed) trees and a circular tambark area. The skies were clear for entirety of play, with the sun providing a bit of extra warmth on quite a nice day, somewhere between ~20-25C. We had quite a good player count today, starting already in the 20s early in the day, as more players crept in we hit a peak of around 25 players. A lot of these were relatively newer and inexperienced players. Throughout the day, we had various groups of people come and go, which naturally disrupted our games. This meant that for most of the games, there would be some section of the play area that we had to avoid. This was less of an issue for games like Blind Bomber and Secret VIP, but became quite a problem in the larger gamemodes.

We started the day as usual with a regular Survival. It progressed as per usual, minimal human losses until shields were released. From there, the zombies can continuously hound the human groups to eventual extinction. A recurring theme throughout the day was a general lack of human coordination, and there were many prime examples of that. For much of the game, I led around a small group of newbies to help them survive and get the gist of the game. Entering the late stages of the game, my group was forced towards another group of humans, with zombies chasing both groups. We were surrounded and outnumbered, however we were tagged not through sheer numbers, but through failing to cover all directions. While we were able to stun most of the zombies, one flank was left open and one zombie was able to use that opening to tag several humans, including myself. Better coverage and situational awareness would likely have had the humans escape with minimal casualties. There were few remaining humans, and it was only a few minutes before they all fell to the horde.


We switched to Secret VIP, and played two rounds of it.
In the first round, the zombies made relatively little progress. Despite the release of Tanks at 5 minutes, they were unable to break through human defensive lines, and there were relatively few human casualties. The sheer number of human players meant that the volume of fire was enough even to find off tanks reasonably effectively. It was down to the Traitor to turn the tide. The Traitor was able to acquire the one grenade, and moved to tag the General with it, which would allow the Traitor to still have all the benefits of being a human player. There was a second human next to the General, so the Traitor went to tag them as well with the grenade. That player turned out to be the VIP, so the zombies won this round.
In the second round, the Traitor chose to reveal their identity immediately, opening fire on the humans. While this served as quite an effective distraction, the zombies were unable to take advantage, and could not tag any humans before the Traitor was hit with a grenade. The knowledge that the Traitor was no longer in play helped to solidify the human defences further, and for the most part the zombies were unable to make much progress. Generally speaking, the humans were well enough organised to fend off most zombie attacks, while the zombies were generally not particularly well organised, and so were unable to inflict significant casualties on the human group. Instead, their best chance would be for lone stealth attacks during moments of distraction. As it turns out, this was in fact how the zombies won. One zombie was able to get through the human defensive fire and tag two or three humans before getting stunned. As it happened, one of those humans was the VIP, giving the zombies another surprisingly early win.

The first round demonstrated the power that the Traitor has with the grenade, though was more just a demonstration of why the Traitor is dangerous - and why the Traitor should always make a decent attempt to disrupt the humans. The second round was a demonstration of the necessity for the humans to maintain coverage of all angles at all times, even if the Tanks are preparing a big charge. Quite often the big charge is not what tags the VIP, rather it's a lone zombie who takes advantage of the distraction and chaos that the charge provides. Though big Tank charges are still a huge threat, the humans need to make sure that all angles are covered at all times if they want a chance of surviving the whole 15 minutes. This is exactly why I usually stay away from the main human group in Secret VIP - I focus on covering our flanks while letting the bulk of the humans fend off big charges. With the Traitor revealing themselves early and not being able to achieve any tags, I think we had a solid chance in the second round if we had stopped that lone zombie from tagging the VIP.


We took a break for an early lunch, and when we returned we played a round of Defence Survival.
Early game went quite poorly for the humans. Though we were able to defend the Tank square for some time, the Infector and Husk squares both fell very quickly, within a couple of minutes of starting.The loss of the Tank square was inevitable though, and once the zombies had a Tank, the game devolved into regular survival. There was only one Tank however, so the humans did have a slightly easier job trying to survive.

A lack of human coordination was again a key theme in the early game. There weren't many human players actively defending the Infector and Husk squares, making it much easier for the zombies to break through and acquire those upgrades. Even when those were lost, there was not a great deal of coordination in defending the Tank square, and only maybe a quarter of the humans were on active defensive duty. This made it much easier for the zombies to eventually break through to the Tank square. Another contributing factor was the size of the squares. In previous Defence Survival rounds, the squares would be 3-4m wide, leaving plenty of room to stun any zombies trying to dive for the upgrades. Throughout the year, those squares have slowly become smaller, and were only around 2m wide in this event. This made it ridiculously easy for a zombie to simply reach in and grab the upgrade. With larger squares, it is much more viable to actively defend the squares, and with some really good teamwork it is possible to stall the zombie upgrades to longer than regular Survival times. With these small squares, it is almost impossible to actually properly defend without wasting a lot of darts. Given that the gamemode is called Defence Survival, defending should be at very least possible for longer than a few minutes.


We tried a pair of Blind Bomber rounds, a gamemode that hasn't been played for quite a while. Due to the presence of bystanders in the tambark area, we stuck to using the west side of the play area. Starting from the southmost corner, the first point was a very small tree in the west of the play area. The second point was a tree at the northern end of the play area. In this way, we could have a full game without being disrupted by the bystanders. We also started with quite a large number of zombies. Where most gamemodes start with up to 5 zombies (depending on player count), Blind Bomber had 8-10 starting zombies.

The first round was a complete mess, with the humans losing before the Blind Bomber even reached the first point. In a total lack of human coordination, the Blind Bomber and their tiny escort moved towards the first point, while the rest of the humans hung back and were completely useless. This tiny escort was easily overwhelmed by the full force of the zombies, and they were able to run the bomb off the play area very easily.
The second round played out much better. The now-coordinated human group moved quickly as a group to the first point, and were easily able to begin "arming" the bomb. The zombies were able to use the nearby trees as a staging point for attacks, and were able to get multiple tags, however the human defensive line held firm and they were able to complete the bomb "arming" phase and move the bomb to the second point. The second point is a tree with leafage forming a sparse dome around the trunk. This allows zombies to get up closer quite easily, though also allows the humans to form an extremely dense defence if they group up inside. The majority of the humans however chose to form up just outside the tree, leaving only a few humans within the leafage of the tree. The zombies were able to slowly wear down and pick off humans from the group, culminating in a final confrontation of the few remaining humans within the tree and the rest of the zombie horde. The zombies were able to break through and steal the bomb, running it off the play area to win.

These two rounds provided a perfect contrast in coordination and results. In the first round, with no coordination, the humans failed completely and were humiliated with an extremely early loss. In the second round, with some coordination, the humans were able to reach the final stage, and actually had a reasonable chance of victory. In that final stage, the majority of the humans stayed outside of the leafage, presumably out of fear of the close quarters of the tree. However, it's entirely possible that staying within or at least right next to the tree would have been a better option. By staying together, the humans would have been able to concentrate their fire to fend off just about any zombie attack. Tanks could be easily taken care of in close quarters by the grenade. Furthermore, the leafage blocks sight both ways - while the humans can't see too well outside of the tree, the zombies can't see too well inside either, and the tree prevents zombies from charging in too quickly. While the humans would likely suffer some casualties, they would have likely maintained a better number late in the game, and would have stood a better chance of survival.

Blind Bomber, like Secret VIP, is designed to be a shorter gamemode. Since both timed sections are only 5 minutes each, and the humans want to spend as little time in between, the longest that a Blind Bomber game can realistically last for is still less than 15 minutes. Provided it is set up well, I think it is a reasonable alternative to Secret VIP, as itprovides a similar hectic, close quarters feel, but also has a lot more mobility and space to it. Having an objective that is clearly obvious, instead of hidden, also helps to focus and coordinate players, which I think is very helpful when most of the other gametypes are purely survival, rather than objective based. I wouldn't mind trying it again with access to the full play area.


We ended with a Hostage Survival round. This round was a bit of a mess right from the beginning. The humans were set out as usual with the Hostages among them, each holding their grenade. Because the Hostages must physically hold the grenade, and any physical contact with the grenade is deemed to be a tag, there were one or two incidents of friendly fire. The Hostage would inadvertently (or maybe deliberately) tap the human trying to free them, causing them to become a zombie. Besides those, there was a general lack of coordination from the humans, and only a couple of players actually made an effort to defend the Hostages, with most simply opting to survive on their own, as with regular Survival. As a result, the Hostages made easy pickings for the zombies, and within only a couple minutes of start, there was only one Hostage remaining of the three we started with. The game quickly devolved into a regular Survival from there.

While Hostage Survival is a comical and silly gamemode, I don't think it really adds anything to the game, unlike Defence Survival. If you do a good job in Defence Survival, you can delay the zombies from getting their upgrades, which is by all means advantageous for the humans. In Hostage Survival, there's very little reason to protect the Hostages and keep them as Hostages. Although one of them is supposedly the Traitor, releasing the Hostages grants access to grenades, which are an incredibly valuable tool for fending off Tanks, especially later in the game. There isn't much reason to keep the Hostages bound but alive, besides the threat of a Traitor (which may or may not actually exist). If you free one, you might as well free them all so you can get all the grenades. Bound Hostages are also far too much of a liability to actively defend, and the gain from keeping them alive as bound Hostages is very small, given that a bound Traitor can still tag humans. I think that keeping the Hostages bound and alive should provide a much, much greater reward for the humans. For instance having zombie upgrades tied to particular Hostages would drastically increase the value of the Hostages, and give the humans a significant choice to make.


I had a lot of fun with the Rhino-Fire this event, and we got the opportunity to try out some different gamemodes. Some alterations might be necessary but there is promise and they do provide something different to our regular gamemodes.

Review: Nerf Modulus Tri-Strike (Aus grey trigger)

$
0
0

The Tri-Strike is the first Modulus blaster to be sporting some properly new accessories, boasting the ability to fire three different ammo types from all its components. This is exactly the sort of thing that I was hoping the Modulus line would bring, accessories that wouldn't be seen in the Elite line. I waited for the price to drop a little before picking one up.

The Box


Standard Modulus style box, all the major parts are exposed while the ammo and instructions are hidden away in a corner.

The Tri-Strike Blaster


The base Tri-Strike is a relatively small piece, a very Retaliator-like blaster, just with bolt handles instead of a slide. The detailing on it is decent, the only paint missing from the left is the black for the "NERF" protrusions. This is in stark contrast to the Recon MkII, which lacked a significant amount of detailing from its left side. The greenish-teal colouring isn't too ostentatious and works better than the lime green did with the original Modulus blaster.

Unlike the Recon MkII, the Tri-Strike has a divot below its muzzle for locking barrel extensions. There is also a small amount of detailing on the front face, also in contrast with the Recon MkII. It's good to see Nerf learning from their mistakes.

As is standard, the Tri-Strike has a single tac rail on top, as well as a set of iron sights.

Naturally the Tri-Strike has a stock attachment point on the back. Note that this one lacks the cylinder found on most other springer blasters, this is due to a slight plunger redesign that keeps it from protrunding past.


Though the Tri-Strike has the hollowed out Modulus handle style, most of its lines are smoothed over and so for the most part it is comfortable to hold. I personally have a slight issue with the front edge, which I feel is a little too sharp, but overall it's far better than the original Modulus' handle.
The Tri-Strike's bolt handles are very small, about two-thirds the size of those found on the Longshot and Longstrike. This keeps the compact look and feel that the base Tri-Strike has, however they are still large enough to get a decent grip. The bolt handles may pose an issue if you have large hands.


The Tri-Strike is a mag fed blaster, and so has a magwell quite far forward. As to be expected, it is compatible with all Nerf mags, including drums. Unfortunately, despite the magwell being quite far forward, Nerf elected to keep the mag release buttons on the sides of the magwell. Not only are they unreachable by your main hand from the handle, but they are also annoying and awkward to actuate with your off hand, while grabbing the mag. This makes reloading generally much more annoying than typical blasters like the Retaliator or Stryfe.
The jam door is a simple slide-open one. It's not very big and doesn't open up a particularly large aperture, though I've yet to encounter any jams so far.
Interestingly, pushing back on the Tri-Strike's jam door will actually push back the entire bolt system if the blaster is unprimed. There is no jam door lock, so it can be opened at any time. Due to the internal design however, the bolt can push the jam door closed, so likewise the jam door can push the bolt open.


Here's the Tri-Strike next to a Recon MkII. There are naturally a lot of similarities, although there are also some important differences. First up is the difference in priming methods, the Tri-Strike using a bolt and the Recon MkII using a top slide. The next is the overall length, with the Tri-Strike's handle being noticeably further from the muzzle. This emphasises the distance from trigger to mag release - while the Recon MkII's mag release is quite close, the Tri-Strike's is quite far. Naturally the jam doors are also different, the Tri-Strike's being a slide-open and the Recon MkII's being a flip-open. Overall, while the two share many similarities, there are also a couple of important differences that will likely influence which one is more suitable for you. The biggest difference is that while the Recon MkII and Retaliator are compatible with aftermarket pump grips, the Tri-Strike is not.


The 10 Dart Mag


The 10 dart mag is exactly what it sounds like - a mag sized to hold 10 darts. This is a straight mag, rather than a banana mag, so is actually shorter than a 12 dart mag. That's all there is to it. I personally find it a little odd that Nerf made an entirely new 10 dart mag design just for the Tri-Strike, when including another 12 dart mag would have been perfectly acceptable, and in my opinion, preferable for the extra capacity.

The Mega Launcher


The Mega Launcher is a barrel extension capable of firing 4 Megas. It's a relatively stubby piece, though is very tall to accomodate the barrels and the pump.
Thankfully, unlike some other Modulus attachments, the Mega Launcher has a spring loaded locking nub to keep it in place.


The Mega Launcher is a pump-to-fire blaster. Simply pull the pump out all the way, then slam it back in to fire a Mega. The harder you slam it back it, the faster the Mega will fly out.


The Mega Launcher uses a set of Smart ARs to fire all its darts. Starting from the bottom left dart (from the user's perspective), the Launcher cycles clockwise through all loaded darts. While the Smart AR block eliminates the need to load darts in a particular barrel, it also introduces extra deadspace internally, which causes noticeable power loss in subsequent barrels. Additionally, Smart AR blocks are vulnerable to double-shots, where two darts in a row are fired in the same firing stroke. This is particularly prevelant with this manual plunger Smart AR blaster, and it is very common to have two Megas fire out at once with reduced power. This is particularly frustrating as often results in the wasting of one, if not both, of the darts. I find that double-firing occurs most frequently with the top two barrels.


The Mega Launcher is not a long barrel extension by any means, being barely longer than the Modulus Dual Rail Barrel.

The Missile Launcher
The Missile Launcher is an oddity of an attachment, consisting of both a tac rail attachment and a stock, connected by an air hose.

The Missile Launcher module simply holds the missile in a tac rail attachment on a missile peg.
It has a tac rail on the top, can attach to tac rails with the clip on the bottom, and a stock attachment point on the back. The air hose feeds into the back, into the missile peg.


Loaded up, the Missile Launcher module looks essentially identical to the barrels of the Thunderblast and Demolisher.

Like the Mega Launcher, as well as the Demolisher and Thunderblast, the Missile Launcher is a pump-to-fire blaster. Unlike those blasters however, the Missile Launcher's pump is in its stock, instead of being an underbarrel pump. Whilst this makes sense in terms of the Tri-Strike package as it completes the full Tri-Strike set, it is horrible to use. The pump is stiff, and having to use the stock as the pump means you can't shoulder the blaster when firing.

As a stock however, the Missile Launcher stock actually works fairly well. It's a decent length as demonstrated above, and is quite sturdy when retracted.

The one complaint I have with the stock is that its handle is too far forward, and so it leaves a rather small space behind the blaster's handle, which can be a little uncomfortable.

The Missile Launcher can be assembled as its own standalone blaster, however it still suffers from the same issues. The stock is still the pump, and so it is still impossible to shoulder and stabilise the Missile Launcher.
I also personally find the lines on the stock handle to be a little sharp and uncomfortable for my liking.

Fully Assembled


When all put together, the Tri-Strike is quite a bulky and hefty blaster. With the exception of the missile launcher, it's reasonably comfortable to use. The Mega launcher is within reach and the Missile launcher stays in place well. The Missile launcher stock makes the Tri-Strike as a whole a decent rifle-size blaster, with a usable secondary. That said, the Missile launcher is still awfully hard to use, and the extra forward weight makes it even harder to stabilise. Additionally, the Missile launcher module adds significant bulk to the top of the Tri-Strike.

Performance

Finally for performance. How do the Tri-Strike and its components stack up?
Range wise the Tri-Strike blaster itself is nothing special. It performs roughly to typical grey trigger standard, achieving around 8-10m true flat with the Modulus/Elite darts included. Not particularly good, but nothing unexpected. The Mega Launcher can achieve anywhere from 8-12m somewhat flat with a good pump. It's very erratic and inconsistent, owing to its pump-to-fire mechanism as well as its Smart ARs. The Missile Launcher is similarly inconsistent, though I haven't had any somewhat flat shots break 9m even from my best attempts. This is in contrast with the Thunderblast and Demolisher, which with a really good pump could launch Missiles beyond 12m.
Accuracy from the Tri-Strike itself is nothing out of the ordinary, perhaps slightly subpar. Naturally the Modulus/Elite darts are the primary cause of this, switching to a better dart type brings the Tri-Strike pretty much up to par with most other blasters. Accuracy with Megas is pretty poor, partly due to being pump-to-fire and partly due to Megas being horribly inaccurate. It is at least possible to brace the Mega Launcher against your shoulder if the blaster it is attached to has a stock. As for the Missile Launcher, oh boy. Since the stock is the pump, you can't brace it against your shoulder and get a decent shot off. As such, accuracy with the Missile Launcher is simply non-existent. It is practically impossible to get a good and accurate shot off.
Rate of fire is a bit more promising. The Tri-Strike has slam-fire, allowing it to beat similar blasters like the Retaliator. That said, due to the internal setup, slam-fire is a lot stiffer during priming than regular cycling, limiting its maximum ROF to around 4 darts per second. Being that the Mega Launcher is pump-to-fire and has Smart ARs, it can also be fired at a decent rate, I'd estimate around 3 darts a second accounting for the extra resistance from being pump-to-fire. Naturally ROF with the Missile Launcher is terrible, being that it is a single shot.

Game Utility
The base Tri-Strike serves essentially the same role as the Retaliator. It's a relatively compact clip (mag) system springer that can perform decently, making it ideal as a secondary/backup, or a small primary ideal for close quarters. The bolt handles of the Tri-Strike do make it a pain to holster or sling compared to the Retaliator, and its inferior power holds it back as well. Nevertheless, for close quarters it can work quite well.
The Mega Launcher is only useful as a Mega firing backup/emergency, as it is relatively inconsistent and not particularly powerful. It could come in handy in games where Megas have special abilities (for instance particular zombies that can only be stunned by Megas), however will be a rather underwhelming in general combat, especially with its tendency to double-fire. Furthermore, the Mega Launcher prevents the use of a pump grip, as it is a barrel extension. Carrying around a seperate Mega blaster would be a much more effective option for actual Mega blasting.
The Missile Launcher is even less usable, as it is vastly outclassed by various other rocket launching blasters, and is extremely difficult to use effectively. It's only effective within maybe a 6m range. Though it is quite bulky as an attachment, as an individual blaster it's not that big, so if you're really desperate for a simple rocket Launcher, the Tri-Strike's Missile Launcher could work in a pinch.

Value and Summary
I purchased my Tri-Strike for 50AUD from Target. it's available for the same price from Kmart, and BigW stocks it for 60AUD, though regularly discounts it to 50AUD anyway. It's certainly not the worst deal around, given that you are essentially getting 3 blasters in one, however given that two of them don't have triggers, it's also not that great a deal. The Tri-Strike itself is a solid base blaster, being very similar to the Retaliator, however the two attachment blasters have very limited utility and are not particularly useful. The inclusion of a unique 10 dart mag when a 12 dart mag would have been a little more useful is also odd. All of this combines to make the Tri-Strike feel substantial, yet not particularly good value. A 12 mag instead of a 10 mag would have helped a little, as would the secondary blasters being more consistent and effective. Overall, while the Tri-Strike isn't bad value for money, I feel that there are better deals to be had, especially given its high price. I'd only recommend the full set if you want a set of gimmicky, marginally useful firing attachments and are content to not have triggers.

Power: 3.5/7 (darts) 5/7 (megas) 5/7 (rockets)
Accuracy: 3/5 (darts) 1/5 (megas) 0.5/5 (rockets)
Rate of Fire: 4/5 (darts) 3.5/5 (megas) 0.5/5 (rockets)
Usability: 3/5
Value for Money: 3/5
Overall: 3.1/5 (darts) 2.81/5 (megas) 2.1/5 (rockets)

Personal Rating: 3/5 - the Tri-Strike is a solid blaster, the Mega Launcher is passable and the Missile Launcher stock is pretty nice, but the Missile Launcher itself is absolutely terrible, and generally the Tri-Strike is inferior to the cheaper Retaliator.

Mod: Desolator Overhaul

$
0
0
Received my Desolator a couple of days ago and fell in love with it, it's a beautiful blaster. I gave it an overhaul hopefully worthy of its shell, and it's turned out quite nicely.
EDIT 7/12/16: A couple of new, relatively small mods have been added.

I used my spare pair of Black Pig 130s for it, as I didn't want to cut the shell and I wanted to run it on 2S. I also put in my spare pair of Worker flywheels. Although I would have preferred truncated Artifact flywheels, I haven't gotten around to acquiring more yet. The wiring was a bit of a pain to run through the magwell, due to the clear window on the side, and the pieces that hold in the stock wiring bulge out slightly due to the thicker wire. As a result, the magwell is a bit too tight for gravity assisted mag drops, but it's still smooth and quite easy to remove and insert mags.
After being cleared out, the Desolator battery tray can fit some decent 2S LiPos inside. I'll be using an 850mAh 25-40C which fits very easily inside, but still provides more than enough current for the Black Pigs and has plenty of capacity. Given how thin the space is though, I could see fitting a decent capacity 3S being an issue.

The mod all up didn't take too long, about 3-4 hours starting from bone stock all the way to completely finished and closed up. Performance overall is pretty good. I'm getting typical Worker flywheel muzzle velocities, anywhere from ~110fps with bad darts to 140fps+ with really good darts on a good shot. Spin-up time is short, nearly as fast as the Hellcat builds I have. Flywheel noise is very harmonious and reserved, I'm getting a lot less vibration than most of my other builds, including my Bullpup RS with the Artifact red cage. Accuracy is fairly good, certainly more than usable for my purposes, and the trigger pull is quite smooth.
All round I'm quite happy how the Desolator turned out. Although I would have liked the magwell to be a bit more loose, I'm sure that could be achieved with a file and/or sandpaper. Additionally, I will likely make a dart stop piece like those in my Rapid Red, Stryfe and Rayven to keep darts popping out the top of mags. I am also considering retrofitting a Stryfe auto kit inisde for the full auto I love so much. This Desolator will likely serve as a backup primary alongside my Rapidpistol.

EDIT 7/12/16:


I added in a dart guide made from cardboard, toothpicks and hot glue, very similar to that in my Rapid Red. It's not perfect, it would naturally be much prettier and sturdier if made from plastic, but it will do for now at least.


I also looked at replacing the mag release with a Worker Stryfe lever, as I find the Desolator's one to be a bit awkward. A little internal clearing needs to be done, but that's easily done in a few minutes with a blade/pliers/other tool of choice. The Worker Stryfe mag release is a little loose on the screw post, but once closed up it works nicely, much more comfortable than the stock mag release.

I also sanded a few pieces internally, and now the magwell is loose as it should be, with gravity assisted mag drops being easy now. I'm very happy with this result, and short of putting an auto kit in, or switching the flywheels for Artifact ones, I probably won't be making many, if any, changes in the near future.

Review: Nerf Doomlands Desolator (US orange trigger)

$
0
0
The Desolator is a blaster belonging to a sub-theme of Doomlands, Impact Zone. This subtheme features a vastly different colour scheme to regular Doomlands blasters, being primarily white instead of primarily yellow/orange. Regardless, they maintain many distinctive Doomlands-style features, such as the translucent window on the sides of blasters. While the Desolator is essentially "just" a Stryfe, being a Stryfoid is by no means a bad thing, as the Stryfe is a great blaster in itself. What the Desolator offers then, besides being a Stryfoid, is its unique and awesome design, and I was rather excited to get my hands on one. Unfortunately, the Desolator never arrived in Aussie stores, so after months of waiting I eventually purchased one off a fellow Aussie who had imported several.

The Box

Pretty standard open box, with much of the back covered by a Doomlands cartoon strip, much like those seen on other Doomlands boxes.

The Blaster


The Desolator is quite a beautiful blaster, featuring all kinds of details like patterning on the grips and faux screws. I imagine a lot of work had gone into designing it to make it look as unique as possible, and that work has definitely paid off. I consider the Desolator to be one of, if not the most beautiful Nerf blaster from the past couple of years. Like other Doomlands blasters, the Desolator has a translucent window on the side showing part of its workings. In this case, all it shows is the magwell and the flywheel cage, which is rather boring in contrast with what the windows show on some of the springers.

The Desolator is not a particularly thin blaster like the Stryfe, maintaining some bulk throughout. It thins out towards the stock however, which looks quite odd when seen from above.


The Desolator has two tac rails, one up front and one further back. In between them is a flip-up jam door. It has two sling points, one beneath the muzzle and one below the handle.


Part of the Desolator's unique design is its curved foregrip. I personally very much like the look and feel of it, with one caveat. The Desolator's flywheel cage necessitates a large protrusion on the left side to contain the motors, however the large box cuts into the foregrip. As a right-hander, the bottom-left cylinder pokes directly into the palm of my left hand, which is a little awkward and uncomfortable.


The Desolator's handle uses a ribbing texture which makes it look distinct, however I personally am not a fan of the texture. It feels a little sharp and slightly uncomfortable to me. Both triggers and the mag release are easily accessible and usable, which ensures ease of use.
My biggest complaint with the handle however is not to do with the handle itself. Just above the handle, a ribbing pattern is continued, however I find it to be rather sharp and uncomfortable, as it cuts directly into the gap between thumb and forefinger. This can be avoided by shifting grip position slightly, however my most comfortable grip position pushes my hand right up against these ribs.


The Desolator stock is a fixed one, and though it looks good, there are a couple of problems with it. The stock is quite short, so if you're not comfortable with this length of stock, you'll never be properly comfortable with the Desolator. A key advantage of the Stryfe is the ability to accept a variety of stocks, so you can choose the most suitable stock length for you. I personally am ok with this stock length, however would definitely have preferred longer. Another key issue with the stock is its thinness. As mentioned previously, the blaster thins out towards the back, and so the end of the stock is actually quite thin, not much wider than a tac rail. This makes the butt of the stock quite thin and sharp, further making the stock more uncomfortable. I certainly think the stock would have been much more comfortable if it were a little longer and wider.

The stock also houses the battery tray for the Desolator. It takes 4 AAs as per usual for a semi-auto flywheeler.


Though the Desolator's magwell is quite stylish and unusual, functionally it is no different to that of the Stryfe's. It accepts all Nerf mags without issue, including drums despite its appearance and design. Inserting and removing mags is generally quite smooth, and the mag release is easy to actuate.

I do have a minor complaint with the magwell lock. This lock disables the flywheels and locks the trigger if no mag is loaded. Naturally this is there for safety, however the button is extremely stiff, and so inserting mags takes a little more effort than they should. Removal of this lock makes the mag insertion and removal perfectly smooth.


Here's the Desolator next to a similarly outfitted Stryfe. You can see the many similarities such as overall size and layout. For me, the biggest difference is the foregrip. The Stryfe has a tac rail under its barrel to allow the use of foregrip attachments, while the Desolator has its own curved foregrip. I personally find the latter to be much more comfortable, as it seems to fit my hands much more comfortably than any of Nerf's foregrip attachments. Everything considered though, the Desolator is in many ways just a fancy Stryfe with a stock, and there isn't much functional difference between the two.

The 10 Dart Mag


A quick look at the Desolator's unique 10 dart banana mag. It's almost identical to the existing 10 dart banana mag, with the exception of the right side being clear, the detailing on the sides and the piece on the bottom. This piece is quite similar to that found on the bottom of Double Dealer mags, and adds a unique style and flair to otherwise pretty ordinary mags.


Performance

Finally for performance. Can the Desolator's blasting match up to its awesome design?

Naturally since this model is an orange trigger, it's getting performance superior to any of my stock grey trigger blasters. Note that I tested the Desolator with near full charge alkalines. Range wise it reaches 11-13m at true flat, easily more with a little upwards angle. In terms of muzzle velocity, it averages 60fps and is quite consistent, rarely dropping below 55fps or firing above 65fps. Naturally during rapid fire muzzle velocity and range drop drastically, as the Desolator takes a good 3 or so seconds to rev up to full speed.
Accuracy is surprisingly good considering its use of Elite darts. Most darts flew quite straight, with veering usually only occuring beyond 9m range. I was seeing quite tight spreads, certainly much better than most other stock blasters using Elites.
Since the Desolator is semi-auto like the Stryfe, its ROF is entirely dependent how fast you can pull the trigger. 4-5dps is easy to achieve with a good trigger technique, and more is possible with practice and special techniques, though you'll stall the flywheels easily if it's still stock.

Game Utility
Since the Desolator is essentially a Stryfe, it fills the same sort of roles. A stock Desolator is most effective in close range, where you can exploit its ROF without worrying too much about range loss. It's less suited to longer range engagements, where more powerful blasters like the Retaliator will have a significant advantage. It is usable as an all-round blaster, but among stock blasters, I find springers to be better at an all-round role due to the significant spin-up time of stock flywheelers.

The Stryfe is significantly more customisable than the Desolator, which allows it to function as a variety of different roles, such as a compact sidearm or large primary. In contrast, the Desolator is stuck as a compact primary, although personally I'm perfectly fine with it as is.

Value and Summary
In the US, the Desolator is a Target exclusive, retailing for 30USD. The Stryfe retails for 20USD, and the Retaliator 25USD. The Desolator represents pretty solid value for money, as for an extra 10USD over the Stryfe, you are getting essentially a complete blaster, with a fixed stock and a larger mag. It doesn't quite compare to the Retaliator, but very little can. Overall, not only is the Desolator a solid blaster, but it's also decent value and looks awesome. It isn't perfect ergonomically, and in particular the stock is strangely short and thin, but it's a great blaster nonetheless. If you're in the market for a decent stock blaster, a great looking flywheeler, or just a fun blaster, the Desolator is definitely a blaster I would recommend considering.

Power: 6/7
Accuracy: 4.5/5
Rate of Fire: 4.5/5
Usability: 3/5
Value for Money: 4/5
Overall: 4.06/5

Personal Rating: 4.5/5 - on top of being a generally decent blaster, the Desolator just looks so cool. It's quickly become one of my favourite blasters, and will likely serve as a backup primary in the future.

Internally the Desolator is very similar to the Stryfe, and can be overhauled pretty quickly with some prior experience. There is one issue of having to route the wires around the magwell, which is a bit of a pain especially if your wire is thick. I'd recommend considering using slightly thinner wire to run through the magwell for convenience.
For cosmetic modders, there's an additional boon. Many of the coloured sections, such as the black foregrip and the front tac rail, are seperate pieces that are easily removable. This makes painting different segments much easier.

Review: Grey "Waffle" Darts

$
0
0

Back when K'nex launched their line of blasters, they also created a unique type of dart tip. This dart looked essentially like an Elite, however instead of having a hollow tip, it used a series of layers of rubber for cushioning. It wasn't too long before aftermarket copies of the K'nex dart started showing up. Shortly afterwards, darts started becoming available with tips similar in style to the K'nex dart, but with holes straight through the tip. This type of dart was dubbed the "Waffle" dart. A friend of mine gave me 30 grey Waffles to try out.


Lengthwise, a typical Waffle foam body is noticeably shorter than that of a Koosh. Since the Waffle head is a lot longer than a Koosh head, the overall length comes out around the same, about 7.2-7.3cm. However, several of my Waffles had an even shorter foam body, coming in at about 7cm long overall. The foam is quite thick and feels quite sturdy, so should last a fair amount of use before becoming significantly worn.
The holes through the tip allow compression of the tip upon impact, though it takes a fair amount of force to compress the tip fully.


Waffle darts are substantially heavier than Koosh darts, around 1.3g each where gen 3 Kooshes are typically only around 1g each (by my scale at least). This also puts Waffles around the same weight as FVJ5s.


Waffle dart tips have quite a long stem, which makes up a significant portion of the weight considering how hollow the tip is.


Since their overall tip shape is very similar to that of an Elite, Waffle and K'nex style darts are completely compatible with Nerf mags. Unlike Koosh, they are also compatible with long barrel blasters, such as brass breeched Longshots without suffering major damage, or causing major feeding issues. Due to their thickness however, you may find that the Waffles struggle to fire out of barrels that work fine with other dart types.

I tested my Waffle darts in a couple of blasters to see how they would compare to other dart types performance wise. I obtained a set of muzzle velocity readings from my chrono comparing these grey Waffles and some of my used, grey gen 3 Koosh. That data can be found in my Chrono Document. On top of that, I also did some approximate range/spread testing. Note that all Koosh results were obtained using used and worn Kooshes, as I used my last batch of new Koosh on the previous chrono session.

Blaster: Modulus Recon MkII (Aus-spec grey trigger)
Relevant mods: None
Koosh muzzle velocity: ~54fps
Koosh approx range: 8-12m
Koosh end range spread: 0.5m wide
Waffle muzzle velocity: ~48fps
Waffle approx range: 8-9m
Waffle end range spread: 0.5m wide

Blaster: Elite Alpha Trooper
Relevant mods: Hobbymods 7kg spring
Koosh muzzle velocity: ~78fps
Koosh approx range: 16-21m
Koosh end range spread: 1m wide
Waffle muzzle velocity: ~80fps
Waffle approx range: 18-20m
Waffle end range spread: 0.75m wide

Blaster: Elite Stryfe
Relevant mods: Blade 180s/-3240s, 2S LiPo
Koosh muzzle velocity: ~108fps (~124fps with new Koosh)
Koosh approx range: 17-22m
Koosh end range spread: 1m wide
Waffle muzzle velocity: ~107fps
Waffle approx range: 19-21m
Waffle end range spread: 0.75m wide


Blaster: Doomlands Desolator
Relevant mods: Black Pig 130s, Worker flywheels
Koosh muzzle velocity: ~135fps
Koosh approx range: 18-22m
Koosh end range spread: 1m wide
Waffle muzzle velocity: ~127fps
Waffle approx range: 20-22m
Waffle end range spread: 0.75m wide


In general, Koosh tended to achieve a higher max range, as well as higher muzzle velocity (with new Koosh at least, out of the flywheelers). Waffles tended to be a lot more consistent and had less horizontal spread. I was quite impressed at how consistent and accurate Waffles were, they were nearly as good as FVJs without having a solid tip, so are somewhat safer.

Overall I was quite impressed with the Waffle darts. They offer accuracy and consistency superior to Kooshes, without as much range loss as USCs. I am actually considering buying several hundred Waffles to supplement or replace my Kooshes for the improved accuracy and compatability. Furthermore, Waffles are also available at a significantly lower price than Kooshes.

That said however, there seems to be a significant variance in the quality of Waffle darts. This Reddit thread details a variety of issues that other people have had with Waffles, including poor tip gluing and inconsistent foam. I too have experienced somewhat sub-par tip gluing, with only the stem of the dart tips being securely fastened. I have yet to have any darts be decapitated by being fired however, and this is after running the same batch of darts through my Worker flywheel Desolator, and Artifact Bullpup RS several times each. Nevertheless, it's something to watch out for.

My friend used this eBay link to purchase the Waffles.

Loadouts with MTB

$
0
0

MTB recently uploaded another of their loadouts vids, this time featuring my Bullpup RS (and associated other parts), as well as my Rhino-Fire. It covers all the major points and is of course a far higher quality video than anything I'd make myself.

If you're wondering about the lack of activity recently, no I'm not leaving the hobby or anything so major. It's simply a matter of not having the time to produce content, and not having any real content to actually produce. I won't be doing anything Nerf related for the next month or so, but I will be returning in time for the March Melbourne events, and hopefully by then I'll have more content to put up.

As a final note, for anyone who has posted a comment in the past ~2 months, my apologies for not approving the majority of them, a change in the Blogger UI meant that I actually don't immediately see the number of comments awaiting approval, and I only just now remembered to check them.

2016 Nerf Roundup

$
0
0
I somehow forgot to make this roundup post at the end of 2016, so here it is, two months late.
2016 was an up-and-down year for Nerf, there were some good releases, and some not-so-good releases. Non-Nerf brands had a fantastic year however, with both Buzz Bee and Dart Zone releasing some real winners.
Alien Menace
Alien Menace is a new Nerf theme for 2016, with specially coloured darts and a very different, almost organic aesthetic to the other Nerf lines.
The Incisor is a semi-auto flywheeler with a 16 dart cylinder. Uniquely, its jam door is on the underside, and is opened by swinging out the foregrip piece. It's certainly an unusual blaster, though functionally very similar to the Rebelle Fearless Fire. RRP is 40USD, which is rather high as usual for Nerf's smaller themes.
The Ravager is an odd, 8 dart revolver. It's pump action, and features 8 barrels in groups of 2; each pair of barrels is linked with a Smart AR system. As such, the turret only has 4 positions. It is the first time that Nerf has incorporated their Smart AR tech into a turret system, and with the unique Alien Menace styling makes the Ravager a very unusual blaster. RRP is 30USD, which is very high considering its low capacity.

Doomlands 2169
Doomlands received multiple new releases this year, tripling the size of the theme's range.
The Double Dealer is functionally two Rampages stuck together, operating off one pump and handle. It has two magwells, and fires both barrels at once. Besides a very nice pump handle however, the Double Dealer is mostly disappointment. Despite firing two darts at once, it uses only one plunger tube, and so stock performance is lackluster with two mags. Using just one mag brings performance up to acceptable levels, though really defeats the purpose of the blaster. Furthermore, the Double Dealer is notorious for frequent and severe jamming that make the blaster unusable very quickly. Its RRP is 40USD, which would have been bearable if it performed well and was reliable.
The Persuader is essentially a retooled 4Victory, with a 4 dart Smart AR block and a hammer prime. A much larger shell and vertical Smart AR block however make it far harder to holster, and it's a little lacking in power. Its RRP of13USD isn't too bad, but it faces serious competition from the Hammershot, which is only 2 USD more, while being more powerful and reliable, having significantly better mod potential, and holding an extra dart.

Doomlands also received its own subtheme, Impact Zone. The primary difference is mainly in just aesthetics, with the Impact Zone blasters having white as their main colour.
The Desolator is a semi auto mag fed flywheeler, essentially identical in functionality to a Stryfe. It performs about the same and can be modded in the same ways, so makes for a solid, stylish alternative to the Stryfe for a flywheeler primary. An RRP of 30USD makes it quite reasonable compared to a base Stryfe at 20USD.
The Longarm is essentially a Spectre with a long barrel and a very high price, there's absolutely nothing special about it. Its RRP of 20USD is very high for a basic, slide primed revolver.

N-Strike
The N-Strike line received a few new releases, all single shots.
The Bowstrike is a basic, compact single shot blaster with unnecessary mini bow arms and a pop-up sight. Its RRP of 8USD is not a bad price, but the blaster itself is unremarkable.
The Glowshot is another basic, compact single shot, however has the special feature of lighting up when the button on the back of the handle is pressed. There are actually two variants of the Glowshot, one with trans-green plastic (as pictured), and one with clear plastic. Its RRP is also 8USD, which again isn't bad.
The Sharpfire Delta is just a blue version of the N-Strike Sharpfire, without the barrel and stock. Its RRP of 10USD is not a bad deal considering its substantial mod potential, though is yet another relatively unremarkable release.

Elite
The Elite line also received relatively few new releases, though at least only one of them was a single shot.
The Dual-Strike is an unusual blaster, featuring the unique ability (among modern blasters at least) to switch between and fire two different ammo types. It holds 3 of each Elite and Mega darts, in their own set of 3 barrels with Smart ARs. The Dual-Strike also packs tremendous mod potential, with a massive plunger tube allowing for an incredible amount of power. An RRP of 20USD is a little high for such a low capacity, but its unique feature and great mod potential make it worth consideration.
The Hyperfire is a full-auto mag fed flywheeler, which offered a lot of promise when it was first revealed. Instead of using a conventional motorised pusher however, the Hyperfire introduced the conveyor belt feeding mechanism, contained within its jam door. This feeding mech, while new and novel, was far less reliable than a conventional pusher, particularly with used darts and drums. Additionally, the stock flywheel cage of the Hyperfire utilises canted flywheels, which do nothing but spinout darts. Additionally, the Hyperfire's much less conventional design offers non-ideal ergonomics, particularly with the fore-end. Overall, while the Hyperfire showed promise, its execution left it significantly sub-par compared to the Rapidstrike. Its RRP is 50USD, which is a little high, though not completely unexpected.
The Pocketstrike is an odd, rectangular single shot very similar to the Jolt. Uniquely, its plunger tube is actually rectangular, unlike every other Nerf plunger tube which is cylindrical. Besides that though, the Pocketstrike is an unremarkable single shot. Its RRP is 8USD, a little high considering the Jolt is 6USD.
The Stratobow is a very odd bow, featuring a bow-style draw that actually primes a plunger, and a 15 dart clip that advances upwards with each shot. It's very unusual, yet is one of the more practical Nerf blasters released this year owing primarily to the lack of practical Nerf blasters this year. Its RRP is 30USD, which I'd consider to be fairly high for what it is.

Mega
Mega only received two new releases this year.
The Lightning Bow is a single shot bow blaster, and like the Stratobow, drawing the string actually just primes the plunger in the handle. Its RRP is 20USD, which is an absolute rip-off for a single shot bow blaster that is completely unremarkable.
The Mastodon is a full-auto flywheeler that uses a 24 dart cylinder. It's a gigantic blaster, with a chainsaw grip much like the Vulcan. With a decent ROF and power, it's a fantastic just-for-fun, ridiculous blaster. An RRP of 80USD is very high, making the Mastodon something you'd only get near retail price if you really, really wanted it.

Modulus
The Modulus line got a number of additions of varying utility, primarily a variety of blasters to complement its already impressive attachments lineup.
The Battlescout is a pump-action, clip (not mag!) fed blaster. It uses its own proprietary 10 dart clips instead of any pre-existing ones, or Nerf's pre-existing mags. Additionally, it includes a tac rail camera rated for 720p videos, a substantial improvement over their previous camera blaster. Its RRP of 70USD however makes it a very difficult buy to justify, considering the blaster itself is near-useless due to a lack of spare clips, and the camera is still not a particularly good one.
The Ionfire is essentially just a Sharpfire retooled to accept various attachment. It can take barrel and stock attachments, and has two tactical rails. Functionally, the Ionfire is essentially the same blaster, a breech loaded single shot. Compared to the Sharpfire Delta, you're paying 5USD more (RRP of 15USD) for the extra attachments and attachment compatability, which isn't terrible, but it is still just a single shot.
The Recon MkII is essentially a slightly retooled Retaliator with some new attachments. The base blaster has some notable differences, including a handguard and a side tac rail, but functionally is identical to the Retaliator. The front barrel attachment is a new, short design, however due to its length does not support a functional tac rail on the bottom, so serves no real purpose besides aesthetics. Likewise, while the stock is a new design, it is extremely short and so can be rather uncomfortable to shoulder. Furthermore, the Recon MkII includes merely a 6 dart mag, a significant downsize from the Retaliator's 12 mag. All of that, combined with having the same RRP as the Retaliator (25USD), making the Recon MkII a fairly underwhelming blaster, especially compared to the Retaliator.
The Tri-Strike, as its name suggests, can fire 3 different ammo types. The base blaster is a bolt action Retaloid with slam-fire, and comes with a new straight 10 dart mag. The barrel attachment uses a manual plunger and a 4 barrel Smart AR system to fire 4 Megas in quick succession. The Missile launcher attachment attaches to a tactical rail, and is fired by a manual plunger within the stock attachment. While the base blaster itself is perfectly decent, both the Mega and Missile launchers are severely limited in mod potential, and the Missile launcher in particular is very awkward and uncomfortable to use. For an RRP of 50USD, the Tri-Strike is not the best deal around, however it is still one of the better Nerf releases this year, and is quite a bit of fun to play with.

Rebelle
The Rebelle line continues to do well and received a number of new releases in 2016.
The Cornersight is is slide primed blaster with a 4 dart Smart AR block. Its unique feature is the ability for the barrels to turn left or right 90 degrees, which in conjunction with its side mounted mirrors, allow it to shoot around corners without exposing its user. Though not at all a practical blaster for general Nerf combat, it is nonetheless a rare and fun gimmick. An RRP of 20USD is perhaps a little high compared to what else is available in that price range, but it's far from the worst deal out there.
The Epic Action Bow is a bow-action Joltoid, with pulling the string actually drawing back the plunger. With the proliferation of bows, especially in the Rebelle line, the Epic Action Bow is another uninspired, uninteresting "new" blaster. It does have one redeeming feature, that being its low RRP of 10USD.
The Flipside Bow is an odd conglomeration of parts, combining the ever-present spring powered, bow primed action of most of Nerf's bows, with the dual flipping cylinders of the ZS Flipfury. This all makes for a bow that is quite large and unwieldy, and all round rather weird. An RRP of 25USD doesn't help its cause either, as there is a significant variety of good blasters available within that price range.
The Lumanate is essentially a reshell of the Rebelle Messenger, with a light-up feature. It has a 3 dart Smart AR block with a pull-back prime, and some built in lights. In conjunction with light up barrels, the Lumanate also includes darts with glow-in-the-dark tips. For the same RRP as the Messenger, 15USD, the Lumanate is a solid, comfortable pistol that can pack a lot of power as well as having quicker follow-up shots than typical single-shot pistols.
The Trilogy is a Rebelle-ified Triad. It shares essentially the same overall design, with the lines smoothed out and curved to fit in better in the Rebelle line. For an RRP of 8USD, it serves the same purpose as the Triad - a cheap, effective pocket pistol that is easy to use and can pack surprising power.
The Wingspeed is an odd, folding bow firing Rebelle arrows. At an RRP of 20USD, it's the cheapest Rebelle bow to fire arrows, along with the Courage Crossbow. I really have nothing to say about it, bows are really not my thing.

RIVAL
The Rival line received two new blasters to its fledgling lineup, both offering something new to the line.
The Atlas is a pump-action, mag fed Rival blaster that fires two balls at once. It's the first of Nerf's mag fed blasters to fire multiple rounds from the same magazine with one trigger pull, making it one of the truest shotgun blasters among recent releases. Unfortunately, the Atlas is rather lacking in power, and a number of units also suffer from reliability issues that can make the Atlas very hit-and-miss. With a typically high RRP of 40USD, the Atlas is a decent, if flawed, Rival blaster.

The Khaos is a full-auto, mag fed Rival blaster that uses its own proprietary mags. These large mags have a capacity of 40 balls, but are not at all cross compatible with the pre-existing Rival mags. The Khaos is a very good blaster, sporting solid range, reasonable accuracy up to a certain range and a decent ROF. Furthermore, it sports substantial mod potential similar to that of the Rapidstrike - a full overhaul can achieve 10+bps at a good 100+fps. While its RRP is quite high, at 70USD, and its mags are proprietary and only just becoming separately avaliable, the Khaos is one of the best Nerf blasters released this year and is certainly worth a look if Rival is at all interesting to you.

Zombie Strike
The ZS releases this year focus primarily on the roleplay aspect of the series, which is by no means a bad thing.
The Brainsaw is a pump-action blaster that holds 8 darts in a Smart AR block, much like the Roughcut. Unlike the Roughcut however, the Brainsaw fires only one dart at a time, and so fires all eight in sequence. In between the two sets of four barrels is a stylised chainsaw, with the end of it being a circular saw blade made of foam. This foam blade can be spun by pulling the faux starting handle. The Brainsaw is overall not a great blaster, as the pump is not particularly well designed and the excessively long Smart AR system drains a lot of power from subsequent barrels. For the RRP of 30USD, there are definitely many other good blasters that can be had. That said, the Brainsaw is not at all designed for practical performance blasting, and as a roleplay blaster it does the job very nicely.
The Clampdown is just a retooled Jolt with a handguard. In keeping with the cobbled-together aesthetic of the ZS line, the Clampdown's handguard and priming handle are made to look like a clamp, and the blaster overall looks like it has been thrown together from all kinds of parts. For the same RRP as a regular Jolt (6USD), the Clampdown is functionally the same, a solid last-resort blaster, just a little bulkier.
The Crosscut, like the Brainsaw, is a blaster primarily intended for roleplay. It has a 2 dart Smart AR system, with a pull-back prime. In terms of blasting, it functions essentially like a Messenger with one less barrel. Its special feature however is a foam saw blade mounted on the left side, which spins when the secondary lower trigger is pulled. An RRP of 15USD is not a bad price for this fun and thematically appropriate roleplay blaster.


Buzz Bee
Last year's Ultra Tek line gave Buzz Bee a big boost, propelling them into legitimate contender status and really giving Nerf some stiff competition. 2016 saw a number of solid new releases from Buzz Bee, but by far the best of them was the Ultra Tek Destiny.
The Destiny is an air-powered, full-auto blaster that uses its own proprietary 20 dart clips. It is essentially a foam-compatible version of the BoomCo Rapid Madness, with a horizontal clip well, a huge pump stroke and a chamber vent button. After around 20 pumps to fill the bladder, the Destiny can let rip its 20 darts in well less than two seconds - I've clocked it emptying its entire clip in one second, and many others have witnessed reliable 12-14+dps. This incredible ROF, combined with its very reasonable RRP of 25USD made the Destiny one of the most fun, and easily one of the best releases of 2016.

Dart Zone
Like Buzz Bee, Dart Zone really stepped up its game with recent releases, sporting Elite-competitive range claims, and the power to actually meet those claims. Like with Buzz Bee, there was one standout release of the year, the Magnum Superdrum.
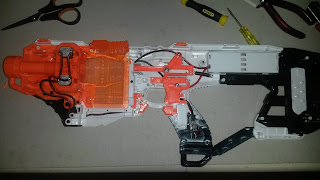
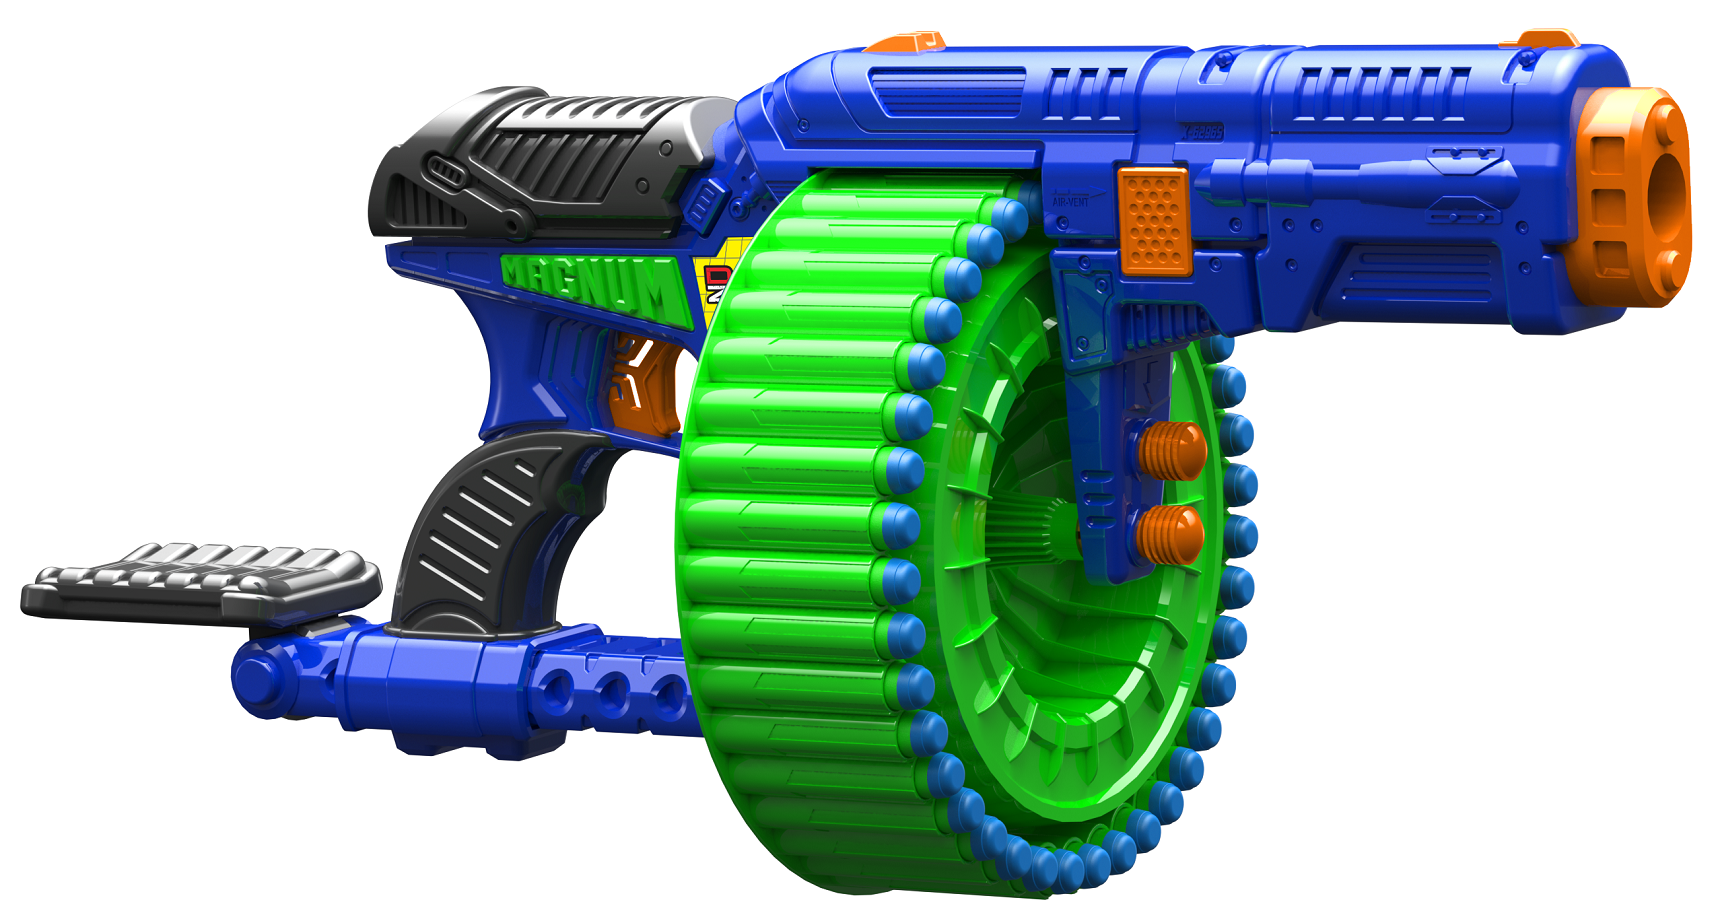
The Magnum Superdrum is a slide-primed blaster with a 40 (!) dart cylinder and slam-fire. It packs considerable power, easily reaching its range claim of 80ft, and newer revisions even feature easily swappable drums for quick reloads. All of this for an incredibly low RRP of 20USD made the Magnum Superdrum the best release of the year for many Nerfers.


Overall 2016 wasn't the best year for Nerf, with a distinct lack of good releases across the board with a few exceptions. For the hobby as a whole however, 2016 was a great year. We saw some great blasters from both Buzz Bee and Dart Zone, who look poised to give Nerf a serious run for its money in 2017. We also saw a massive boom in aftermarket parts available for the hobby, including body kits, flywheels, motors and other accessories.

Mod: Artifact Motor as a Rapidstrike Pusher

$
0
0

The Artifact motor is the fastest motor created specifically for Nerfing purposes. It is rated to 50k RPM at 7.4V, significantly beyond the next closest of the MTB Wolverine Mk2 or Honey Badger, at around 45k RPM at 7.4V. The Artifact motor is also an odd size, being a little longer than the traditional 130 motor, but significantly shorter than the long 180 motor.
Due to its length, the Artifact motor cannot be seated in the Rapidstrike pusher box with the back supports in the way that a 130 sized motor can. This is rather unfortunate, as it makes the motor mounting a little less stable. The e-tape (which is a highly non-ideal solution for this) is used to stabilise the motor and prevent it from sliding out.
I removed too much material from the pusher box in my haste, so my motor was even more loose than it should be.
Installation complete, the Artifact motor is just short enough to still fit in an RS shell as a pusher without further alteration.


Time: 1.29
No. darts: 18
ROF: 13.18dps or 790.7rpm
Voltage after firing: 7.55V

Time: 0.957
No. darts: 18
ROF: 17.76dps or 1065.8rpm
Voltage after firing: 11.4V

As demonstrated by the above video, and as expected from its specs, the Artifact motor is capable of beating a Honey Badger or Wolverine Mk2 for ROF. Sheer speed is not everything however; for a motor to be useful, it also has to survive long enough to actually get reasonable use. The Honey Badger has proven itself on 3S, with my own Rapidpistol seeing combat use with no issues. I had doubts about the Artifact motor surviving on 3S, so after a little testing I recorded it again.


Time: 1.186
No. darts: 18
ROF: 14.33dps or 860rpm
Voltage after firing: 11.3V

As clearly demonstrated, its use on 3S has not done the Artifact motor any good. After only a little use (less than 10x18 mags worth), the Artifact motor has already slowed down to slower than a Honey Badger or Wolverine Mk2. Shortly after this video, I switched the pusher motor back to a Honey Badger and it was back up to speed, and didn't sound like it was destroying itself. Based on what I experienced at least, I would not recommend the Artifact motor as a super-high-speed 3S pusher. I think that it would survive decently on 2S as fairly high speed pusher, but overall the Artifact motor is just far too fast for its own good.
As for flywheel use, well I personally most likely won't even bother. I felt that Honey Badgers were unsuitable for 2S flywheel use due to their excessive speed, and Artifact motors are of course even faster.

BlasterTech Parts: Rapidstrike Mag Release, 5kg Elite Spring

$
0
0

I recently ordered a couple of things from BlasterTech (BT). Within that package was a Worker Stryfe mag release, a Hellverine (Hellcat mislabelled as Wolverine), 2 BT Rapidstrike mag releases and a BT Elite 5kg spring. I've covered the Worker mag release and Hellcats before, so this post will be focusing on the RS mag release and the Elite 5kg spring.

The BT Elite 5kg spring (top spring) is a pretty standard upgrade spring. It's intended for Elite clip system blasters such as the Retaliator, Rampage, and so on. I decided to put it in my Tri-Strike.

As expected, it fits and works just fine. Chrono data can be found here. To be honest, I was expecting a little more, however it does seem to feel a little weaker than some of my other upgrade springs for Elite clip system blasters. Priming the Tri-Strike with this spring certainly is not that difficult, and does perhaps feel a little easier than priming some of the other upgrade springs I have.

The BlasterTech RS mag release is a 3D printed part styled after the Worker Stryfe mag release. It has much of the same look, though is a little shorter. BT offers extended mag releases for Rapidstrikes, Demolishers and Modulus' (all are slightly different designs), in orange, blue and black.
Here's the BT mag release next to the stock part (with a homemade lever mag release).

Installation is very simple, just remove the old mag release parts and slot in the new one. I feel it is worth noting that the while the main hole through the mag release part is nice and loose, on one of my mag releases, the top hole that attaches to the mag lock itself is a little tight, and I believe this adds a little unnecessary friction to the mag release system. I think widening that hole slightly would make it a lot smoother. The other mag release I bought had no such issue.

The BT mag release is a relatively short mag release, at least compared to say the Gavinfuzzy mag release. It's still perfectly easy to actuate with the middle finger of your trigger hand, but grabbing it with your off hand while removing the mag is a little more difficult than with a longer lever. It's for this reason that the mag release on my Bullpup RS will be staying the Gavinfuzzy design, but for my other conventional RS builds, the BT mag release works nicely. It looks decent and works smoothly, and is easy to actuate while not being so long as to potentially become an issue. If you're after a relatively shorter lever mag release for the RS/Demolisher/Modulus, the BT mag release is certainly a good option.

MHvZ Game Report 11/3/17 - More Flywheel Saturation, Successful Husk

$
0
0

I hadn't attended a full Nerf event in months, so I was really excited to get back into action at this month's HvZ.

Gamemodes:
Regular:
  • (Regular) Survival - Standard HvZ gametype, humans try to survive for a given amount of time (or until the last human falls). Zombies are given access to upgrades at various times, we used Infectors at 5 minutes, Tanks at 10 minutes and Husk at 15 minutes. Last human to fall wins. 
  • Secret VIP - There are 3 special players in this game: the VIP, the General and the Traitor. The VIP is a human who the other humans are trying to protect and is restricted to a given area (we used the usual tambark area), while the Traitor is a zombie masquerading as a human. When stunned, zombies must move outside of the VIP's area before counting down their stun. The only person who knows the VIP's identity is the General, while all original zombies know the Traitor's identity. Everyone knows the identity of the General, making them the only guaranteed trustworthy human. The Traitor acts as a human, but can at any point do a single Traitor zombie tag, revealing that they are the Traitor, and thus turning into a regular zombie. Additionally, if a human hits another human, the hit human is stunned as if they were a zombie, however they can still fire their blaster. If the humans protect the VIP for a given period of time (e.g. 15 minutes), the humans win. If the zombies successfully tag the VIP, the zombies win. Zombie upgrades are unlocked on a timer like Survival, with Infectors available from the start, 5 minutes for Tanks and 10 minutes for Husk. If a human is hit by a grenade, they are instantly turned into a zombie. This is the only way to actively eliminate the Traitor.
  • Defence Survival - The three zombie upgrades of Infector, Tank and Husk are spread throughout three separated squares, about 2-3m wide. Zombies can pick up the upgrades if they touch the desired upgrade inside the squares. If a zombie is stunned within a square, they must move outside of the square before counting down their stun. Zombies are only allowed one upgrade at a time.
  • 6 Round Sweep - Each human starts with only 6 darts, and must pick up ammo from the field. Ammo can also be returned to the ammo crate, with an admin recording each player's deposited ammo count. The player with the highest ammo count deposited at the end of the game wins. When hit by a dart, humans must touch a tree to respawn. While moving to respawn, humans are invulnerable to darts, but are still vulnerable to zombies. When a human is out of respawns, they immediately become a zombie. Zombies can pick up darts off the field and return them, but this does not count to their ammo count score. A zombie tag or melee hit immediately turns a human into a zombie, regardless of number of respawns left. The game ends when all players are zombies.
New:
  • None

Zombie rules:
Zombies tag humans with their hands onto any body part, blaster, tactical gear, etc, turning the human into a zombie. If a human hits a zombie with a dart, the zombie is stunned for a count of 20. A human can also stun a zombie with melee, but only with a direct hit to the back.

There are 3 standard zombie upgrades/mutations/perks: 
  • Infector - zombies get to use foam swords, pool noodles, etc. Tags with said foam melee weapons on humans count as regular tags. Said melee weapons can also be used to block darts. 
  • Tank - zombies get to use shields, which block darts. The shields cannot be used to tag humans, presumably as a precaution against shieldbashing which could cause significant injury. 
  • Husk - a zombie gets to use a ranged attack, in this case a Vortex Mega Howler. A ranged Husk attack counts as a regular zombie tag. Husk ammo can be picked up by any zombie, but can only be used by the Husk naturally. The Husk may move from the place they were stunned to retrieve their ammo, but do not count down their stun timer until they return to their original stun place.
Zombie upgrades cannot be stacked, so a zombie can only have one upgrade at any time.
If in play, grenades can stun a zombie with a hit to any equipment, including swords and shields, and can be reused at will. If human vs human rules are in effect, a grenade hit to a human will turn that human into a zombie immediately.

Blasters:
Since there were a lot of different blasters there, I've generalised them and only listed down the ones that I saw as significant or noteworthy, or remember for that matter. Being that I can't be everywhere at once, it's entirely possible I completely missed some blasters.
Recurring/Regulars: 


Elite Rapidstrike (various motors, LiPos) - standard high ROF blaster at HvZ, ideal against larger groups of zombies and close quarters combat. Requires a lot of trigger discipline and ammo to keep in check.
I've included a particular Rayven in this category as it has an automated pusher, turning into a full-auto blaster and making it perform very similarly to a Rapidstrike.
I also trialled a short brass dart guide in my Bullpup RS, just a shortened version of my existing brass guide. It performed very well, with minimal, if any, muzzle velocity loss while also greatly improving feeding reliability.

ZS Slingfire (upgrade spring) - regular blaster used by one particular player. He utilises its one-handability well, and generally has a lot of fun with it. Not a particularly practical blaster, due to having significantly inferior ROF to more powerful blasters such as a pump-gripped Retaliator, but a stylish and fun blaster nonetheless.


Elite Stryfe (various motors, LiPos) - standard all-round blaster at HvZ, effective in most situations. Very easy to pick up and use effectively, even with a bare minimum of practice.


N-Strike Rayven (various motors, LiPos) - a well built Rayven performs essentially like a Stryfe, a solid all-round blaster that can hold its own. There are several issues with the Rayven that hinder its performance and must be fixed that do not occur with the Stryfe, which is a significant contributor to why Rayvens are less common than Stryfes.


Elite Alpha Trooper (various upgrade springs) - an easy-to-build pump action springer that works decently well, however in many respects is inferior to a number of other blasters. In particular, a pump-gripped Retal, while much more expensive, is also a lot more powerful, robust and customisable, and top notch flywheelers tend to have much higher ROF and superior range.


ZS Sledgefire (singled, upgrade springs) - a fun, if slightly impractical choice for HvZ. Capable of quite accurate mid-long range fire support if built correctly, however suffers majorly against multiple targets or in close range due to being a single shot.

Modulus Recon MkII (unknown mods, if any) - Recon MkIIs and Retaliators are typically very common at HvZ, usually equipped with pump grips, but this was the only one I saw on the day. With an upgrade spring and a decent pump grip, they offer usable ROF with quite good power, as well as a lot of customisability. Without a pump grip, they are quite compact, making them easy to maneuver.

New/Infrequent: 

Doomlands Lawbringer (unknown mods, if any) - essentially a high capacity, rifle sized Hammershot. Usable power, good capacity and one-handability make it a decent scavenger blaster, however its relatively low ROF and slow reload leave it at a significant disadvantage as the horde grows larger.

Dart Zone Enforcer (overvolted) - an odd but fun and novel blaster. Its use of flywheels allows for decent performance, and the large looped belt offers a decent capacity that is also easily reloaded on the fly. It has a low ROF for a full auto however, and the lack of spare belts makes quick-reloading a non-possibility.


Elite Demolisher (unknown mods, various extras) - a Demolisher would perform very similarly to a similar spec Stryfe, being a solid all-round blaster when built well. One Demolisher had an underbarrel Roughcut, which provides a nice extra burst of darts at the cost of significantly increased forward weight and bulk.

Elite Rhino-Fire (rewired, Honey Badger pusher) - an absolutely ridiculous but extremely fun blaster. Its range and accuracy are quite terrible, well below that of a good Stryfe/etc build, and its ROF is not exceptional compared to builds such as a Honey Badger pusher'd RS. That said, thedual reciprocating barrels spewing out a cloud of foam is quite a sight to behold, and incredible fun to be wielding.
This will probably be the last time I bring the Rhino-Fire to an event for a while.Though it is a lot of fun, it is also very inconvenient to transport and set up.


Same play area as always, a large triangle filled primarily with grass, with a couple of notably large trees. One particularly large group of trees is also covered in tambark, circled in orange. The blue squares indicate the Defence Survival squares. Weather was very nice on the day, temperature peaking around 26C with some sun and some cloud cover. Player count was also quite high, peaking around 35.


As usual, we started off with a regular Survival round. Nothing significant occured until the zombies gained access to Tank shields, and even then it took a little while to start getting the tags. The Husk was later able to provide a further threat and distraction, however generally speaking it was either Tanks or poor situational awareness that got humans tagged. Eventually the horde would reach a size where tactics were no longer really necessary and they would be able to continually whittle down the remaining humans through sheer attrition and numerical superiority.


We switched to Secret VIP for a couple of rounds. Generally speaking, the humans performed much betterin this event than in past Secret VIP rounds. Somehow I have no recollection of the first round we played, so I can only describe the second and third rounds.

In the second Secret VIP round, the humans were very well coordinated and stood up well even in the face of repeated Tank charges. The Traitor revealed themselves late in the game, however as always I wasn't near them when that happened, and they seemingly just used their Traitor tag on the General. While human numbers did begin to dwindle in the dying minutes of the round, there were still more than enough to provide quite a substantial volume of fire.The VIP, along with at least 10 remaining humans, survived the entire 15 minutes for a human victory.

In the third Secret VIP round, after the lunch break, the humans again performed very well. I was selected as the VIP this round. Through the first 12 or so minutes, the humans held firm against Tank charges, though the Husk made his presence known and feared, and was able to achieve a couple of ranged tags, as well as providing quite a good distraction. Late in the game, the Traitor revealed themselves and tagged the General, who then conveyed my identity to the Husk. As it happened, the Husk was the one who tagged me from range, while I was busy dealing with other zombie threats, ending the round with a zombie victory.


In a lot of Secret VIP rounds, a big deciding factor is the Traitor. The Traitor is in the best position to throw the human group into chaos, who through sheer volume of fire otherwise have quite a good chance of survival. The Traitor's influence on the game is clearly obvious when looking at the history of Secret VIP rounds. In rounds where the Traitor has attacked the humans from within, the zombies almost always win. Even if the Traitor's attack is quickly stopped, the ensuing confusion and chaos will often allow the zombies to get a number of tags on the distracted humans. Even if the VIP remains untagged through this ordeal, the sudden loss of human numbers is usually enough to swing the round in the zombies' favour. In rounds where the Traitor instead chooses to simply tag a human (usually the General) and be done with it, the humans have a much better chance of survival. Ignoring unlikely scenarios such as the Traitor randomly tagging the VIP, this play generally has a much smaller impact on the human group and often causes them to coordinate better. Although the zombies learn who to focus their attacks on if the General is tagged, the humans now can also know who to focus their defence on, without the threat of the Traitor from within.

The Husk continued to show their power and threat in Secret VIP this event, with several tags including one on myself as the VIP. The confined area of Secret VIP makes it an ideal hunting ground for the Husk, as they can consistently bombard the human group from relatively close range, whether just going for tags or targeting a specific player. In Survival games, the threat of the Husk can be mitigated by simply moving away, as a long range Husk throw is generally much easier to spot and dodge. Additionally, the Husk on their own is rarely a threat as it is easy enough to dodge their throw and stun them. In Secret VIP, the constant danger of surrounding zombies draws a lot of attention away from the Husk, giving them a much better opportunity to score some tags on humans. It was exactly this that left me as the VIP vulnerable to the Husk. Distracted by other zombie threats, I'd left myself open to a mid range throw from the Husk, who nailed the throw perfectly, hitting me square in the back.


We then played a round of Defence Survival. In this round I set up the Rhino-Fire near the Tank square, and had a lot of fun hosing down any zombies who got too close. The slow rev time of the Rhino-Fire quickly became a problem however, so I ditched it in favour of using my Rapidpistol. I let other humans use the Rhino-Fire, and they had an absolute blast with it. All three squares were lost quite quickly, forcing the humans to leave their defensive positions, and the game quickly devolved into a regular Survival. 

After losing defensive positions, I linked up with another group of humans, and we stayed along the north edge of the play area. Through group coordination, we were able to fend off a number zombie attacks including multiple Tanks for quite a while. As our numbers dwindled and zombie numbers grew, our defence became less and less solid, until one fateful Tank charge would break our cohesion. In the mayhem, we lost multiple humans and the remaining survivors quickly scattered. As one of the last few survivors, I was able to stun a number of zombies before being eventually tagged by the Husk.


We ended with a round of 6 Round Sweep. This game is usually played just before the lunch break to partially recover darts used in the first half of the day. This event however, it was instead used as an end-of-event dart recovery. In typical 6 Round Sweeps, there is a fair bit of competitiveness as players typically still have a fair amount of energy, and this fuels the competitivity and combat of the game. At the end of an event however, a lot of players are rather tired, and so there was generally a lot less combat and a lot more of just dart pickup. Furthermore, as a combat pickup game, 6 Round Sweep is still much less reliable at cleaning up the play area than a proper dedicated dart sweep. Although this time around we collected the majority of darts from the field during the round, this can be attributed partly to the game being played at the end of the event, and players simply wanting to avoid another dart sweep.

On the other hand, 6 Round Sweep does offer players some freedom at the end of the event. There are some players who, while picking up darts, would still like to shoot at or chase down other players. Conversely, there are players who would be happy just to pick up and return as many darts as possible. An end-of-event 6 Round Sweep allows for both types of players, as it rewards both those who actively pick up and return darts, and those who defeat other players. The combat element does of course increase the necessary dart pickup, however the volume of players actively picking up darts usually mitigates this.


I had a lot of fun at this HvZ event. The player count in the past two HvZ's I've attended have been well up compared to a lot of last year's events, which is very exciting. I would like to see more variety in gamemodes, but I suspect I may have missed some from the February MHvZ.

A link to the same post on BlasterHub: link

Jase3D Parts: Thumbscrews, Flared Stryfe Magwell, RS Pusher Cover

$
0
0
Ordered some Jase3D stuff as well, a couple of newer parts. I ordered up some thumbscrews, a flared Stryfe magwell attachment, and an RS pusher motor cover.

The Jase3D thumbscrew is a very simple piece. It consists of a hex screw with a 3D printed part screwed on as far as possible.
Since the thumbscrew handle is designed to fit a generic hex screw, it can be easily fitted to any hex screw of the same dimension (I believe the screw is M3 sized). I actually ordered screws that were slightly too short, however had slightly longer screws of the same thread, and was able to move the 3D printed piece over with no issue.
Here's the thumbscrew length I actually ordered, installed on a Stryfe for which it works perfectly. The 3D printed part is a very nice design, which is easily grippable while being relatively small.
With the slightly longer screw, the Jase3D thumbscrew can also be made to fit the Desolator, which due to its tapering shell is a particularly annoying blaster to fit with a thumbscrew.
With the longer screws, the Jase3D thumbscrew has even replaced the screws that hold my Bullpup RS's stock piece on. Even though the two on the left side are close together, they are easily turnable individually.
Jase3D thumbscrews do their job just fine, as does pretty much any other thumbscrew. What I like about the Jase3D ones is that should the need arise for a longer or shorter screw, the 3D printed piece can be easily removed from the old screw, and attached to the new one to make a thumbscrew of the appropriate length. Note that the head is significantly taller than a more generic thumbscrew, such as that of the Worker one, which may pose an issue for sleeker blasters. In contrast, the Jase3D thumbscrew head is also a lot narrower than typical thumbscrews, which works nicely in my situation, but may pose an issue if you can't get a good grip on them. For 3AUD each, Jase3D thumbscrews are a useful and relatively cheap product.

The Jase3D Stryfe magwell is a clip-on piece designed to make loading in fresh mags a little bit easier.
It's a single, wrap-around piece that clips on to a Stryfe magwell.
From the front and rear, the flaring out of the piece is noticeable, though not prominent due to the thickness of the piece.

The piece fits onto the Stryfe magwell using four protrusions, which click into the recessed area of the Stryfe magwell just above the bottom edge. It takes a bit of force to attach, but once on is very secure. Likewise, the piece is also easily removable with some force, however I would recommend against repeated attachments/removals as that will wear out the piece.

With the flared magwell attached, the Stryfe does become noticeably bulkier, though the piece should present little issue unless you use it as a secondary/sidearm in a tight fitting holster.
This angle demonstrates the flared design nicely, with all sides sloping inwards to the magwell to facilitate easier insertion of mags.
With a mag inserted. Note that the flared magwell piece prevents the use of 18- and 35-dart drums, however all straight mags and the 25-dart drum are compatible.
The piece has a gap at the back designed to accomodate extended mag releases. Pictured here is my Stryfe with a Worker mag release, and it works fine.
This shot hopefully demonstrates the extra width that the flared magwell adds to the Stryfe, so as to accomodate the sloped surfaces. With a straight mag inserted, the extra space is clearly obvious (though perhaps less so in this picture).
The all-around design of the flared magwell also adds a portion to the front, which I personally find makes a good (or at least improved) magwell foregrip. I personally found the front of the Stryfe magwell rather thin and somewhat uncomfortable, and the extra width of the flared magwell helps significantly in that regard.
The flared magwell is an accessory designed to improve usability, by increasing the tolerances for reloading. With the flared magwell, a mag does not have to be perfectly aligned with the magwell to be inserted, rather so long as it is caught within the flared magwell, it will slide in just fine. With less need to align a fresh mag perfectly, reloads can be performed slightly faster and with a lot less thought and effort, which in turn can improve combat performance. It does take a little getting used to, as initially it does feel very awkward sliding a mag along the inside of the flared magwell, however the advantage in combat can be quite significant, especially when on the move or under fire.
Jase3D offers flared magwells for both the Stryfe and Rapidstrike individually, as the pieces are not cross compatible. They are available for 15AUD each, which I feel is fairly reasonable for such large pieces. If you have no issue with some extra bulk around your Stryfe/RS magwell, and don't use 18/35 drums, a flared magwell may be a purchase to consider for the extra convenience it offers during reloading.


The last part I ordered was an RS pusher cover. Compared to the BSUK cover, the Jase3D design is far, far more elaborate and much larger.
Like many other Jase3D designs, the RS pusher cover has extra material that wraps around the shell, so as to make installation of it even easier.
The Jase3D pusher cover is a damn good looking one, sharing much stylistic similarity with the flywheel motor cover. It fits very nicely to the Rapidstrike shell.
I used mine for my Bullpup RS. However, due to the placement of my master power switch, I had to remove a little material from the pusher cover to allow it to fit.
After the slight alteration, the pusher cover fits perfectly on my Bullpup RS, and even helps to partially cover the gap in the stock piece (though this is by coincidence). The master power switch is still easily usable, and the rear of my Bullpup RS now looks a good bit cleaner and better.
Overall shot of the Jase3D parts that now inhabit my Bullpup RS. The pusher cover goes very well with the pre-existing flywheel motor cover, and cover up any holes very nicely.
The Jase3D RS pusher cover is unusually expensive at 12AUD, only 3AUD shy of the flywheel motor covers. It's substantially more than any other pusher motor cover, which is often included with the flywheel motor cover, and is even more than a lot of flywheel motor covers. As usual with motor covers though, it all comes down to personal preference. I feel that the Jase3D motor covers are by far the best looking ones out there, whether or not you are willing to shell out the extra money depends on whether you think it's worth it.

Mod: RapidPDW Overhaul

$
0
0

My barrelless RS, the RapidPDW, was my first Rapidstrike rewire, utilising stock motors and some stock switches off a 2S battery. Since then however, I have completed no less than four complete Rapidstrike builds (one of which was not my own), and the RapidPDW was left on my blaster rack collecting dust. I finally got around to giving it a motor upgrade.
I wanted to make use of the two spare Falcon 130s I had lying around for the flywheels, so had to choose a pusher motor. I wanted a slower, high torque pusher motor to make use of the pre-existing live centre wiring (utilising some stock switches), so settled on an MTB Hellcat. At the time, I was also making an order from BlasterTech, so added a Hellverine (Hellcat mislabelled as an MTB Wolverine) to that order.

Pusher motor replacement was easy, I just had to clear out a bit of plastic in the pusher box. Unlike some of my more rushed builds, I made sure to keep as much plastic as possible for minimum wiggle room.

Naturally being a 180 motor, the Hellverine requires some shell cutting to fit. By now, I'm quite used to cutting holes for 180s so was able to make that hole quickly and relatively cleanly.

I used my spare BSUK pusher cover that used to live on my Bullpup RS. I'd replaced it with a Jase3D pusher cover, and wanted to make use of it.

As mentioned previously, I wanted to make use of my spare Falcon 130s.

I also added a BlasterTech mag release, as I strongly dislike the stock RS mag release. I have a couple of homemade lever mag releases, but the BT ones are much better looking and more comfortable.

Overall shot of the internals, fairly standard. Note the e-tape covering PCBs. These PCBs contain stock switches that still run the pusher circuit. As I wanted a lower ROF build, live centre would be the ideal wiring, however I really couldn't be bothered doing another full live centre microswitch build. I'm well aware of how poor these switches are, and I am likely to replace them in the future with proper microswitches, but for now I just wanted a build that worked. I also happened to be out of microswitches, and have only just got around to buying more.


Time: 1.94
No. darts: 18
ROF: 8.76dps or 525.8rpm
Voltage: 11.3V (3S LiPo)

I'm pretty happy with how it's turned out, it's a relatively compact and easily usable RS build. ROF is high enough to be perfectly usable, but low enough to be very easily controllable. Muzzle velocity seems about standard, 100-120fps with blue Koosh, depending on the dart. As mentioned before, I will likely at some point replace the remaining switches in the RapidPDW with proper microswitches, but that's a low priority for me. I'm also currently lacking an appropriate LiPo that will fit in the front compartment, but I'll get around to ordering that at some point. For now, it operates fine using one of my other 3S' for testing purposes. Most importantly though, all four of my Rapidstrikes are now in a superstock viable condition, which I'm very happy with.

Review: Star Wars Jyn Erso Deluxe Blaster

$
0
0
The release of Rogue One brought with it, among other merchandise, a new set of Star Wars Nerf blasters. The Jyn Erso blaster is the most expensive general release one, and the only one of the three that offered any practical potential use. Due to its insanely high retail price, I put off buying it until they were discounted to half price at my local BigW. Is it worth it, even at half price?
The Box

Standard open box type fare, nothing special.

The A280-CFE Blaster
The Jyn Erso blaster is based off of the A280-CFE, a modular blaster rifle. It has been designed to resemble only the main body of the blaster, lacking a stock, scope or extended barrel. The Cassian Andor Deluxe blaster includes blue coloured versions of all of these, however is not available in Australia.

The Star Wars Darts
A quick note about these new Star Wars darts. All of the blasters in the Rogue One lineup use these darts, with a white body and green tip. This doesn't match up with their respective laser colours however as all the blasters in-universe fire red blaster bolts. The incorrect colouring has a reason however, and that is...
...they glow in the dark! Like with other GITD darts, these Star Wars darts do not hold their "charge" for very long, and are not particularly bright, however it is still a neat effect, especially in the dark.

The 6 Dart Mag
A quick note about the included mag, which is a full trans-orange 6 dart Elite style mag, which is new. The fully transparent body allows for the best charging of the GITD darts, as standard Elite mags have one side opaque.

The Jyn Erso Blaster

The Jyn Erso blaster is a relatively large one, with quite a long barrel and handguard. It has a number of molded details, and the grey parts are all grey plastic inserts rather than paint. Those of you more familiar with firearms may notice a number of distinct, familiar features, such as the faux shell ejection port on the right side. This is because the A280-CFE blaster rifle (and its fellow A280 variants), the Jyn Erso blaster's in-universe counterpart, is built from real-life firearms.
The top of the Jyn Erso blaster is quite thin, however the rest of the body has a fair amount of bulk, particularly around the flywheel cage.
The blaster features a single tactical rail, on top in front of the jam door. This is an unusually forward placement of a tac rail, however corresponds to the scope placement of the A280-CFE.

The Jyn Erso blaster accepts Nerf stocks and barrel attachments, however most barrels will be very loose and wobbly due to the lack of a locking divot below the muzzle. There is also a distinct lack of supporting plastic around the muzzle for barrel attachments.


The jam door of the blaster is a hinged one right above the magwell, however due to the thinness of the body in that area, the jam door aperture is quite small and tight. Additionally, the jam door's placement directly behind the tac rail can prevent its use with certain scopes and sights. This makes it extremely difficult to use the jam door to actually clear jams.

The front end of the Jyn Erso blaster is quite tall, housing a number of important features. The bulk of it is rounded as a foregrip, while the upper section is dedicated to a lighting system and a speaker.
The lights and sound system activate whenever the trigger is pulled, causing the barrel to light up in sequence as if actually firing a blaster bolt. This feature is testable while the blaster is still in box, as the blaster is supplied with batteries.
The round foregrip is quite comfortable to hold, being of decent length and width to provide a stable grip. It is however very far forward, a good ~11cm in front of the magwell, far more forward than most foregrips on Nerf blasters. I personally find it too far forward to use comfortably in a typical two-handed grip, however it is appropriately placed given the design of the source material.

The foregrip also contains the battery tray of the Jyn Erso blaster. It uses 4 AAs housed in a 2x2 arrangement, providing a fair amount of extra weight to the front of the blaster.
Between the magwell and foregrip are a series of rectangular protrusions. These protrusions attempt to replicate part of the A280-CFE's design, however form a very uncomfortable area to grip. As I mentioned before, I find the foregrip too far forward to use comfortably, preferring to have my off hand just in front of the magwell. These rectangular shapes make such a grip position uncomfortable and awkward.


The handle of the Jyn Erso blaster is quite different to typical Nerf design, instead emulating a more realistic style appropriate for its source material. It sports two textured grey inserts on the sides, which adds a nice grippy feel. The handle is however fairly small. While I find it fairly comfortable to hold, users with larger hands may find it too small.
The magwell is an odd design, almost but not quite lining up with the faux magwell design on the shell. It is compatible with all Nerf mags and drums without issue.
The mag release is a button on the right hand side. The mag is removed by holding down this button, and pulling out the mag with your off hand. The magwell has more than enough friction to hold in the lighter mags even without the mag release lock.
Interestingly, like the Longshot, there is no mag release button on the left hand sides. As such, left-handers will have a much harder time reloading the Jyn Erso blaster than right-handers, especially when compared to most of Nerf's other mag fed blasters.
This mag release button design has a distinct advantage over the central lever mag release design that is quite popular in the community. It is much, much harder to accidentally actuate than a lever release, making accidental mag drops almost impossible. However its high placement on just one side of the blaster makes it very difficult to remove mags using just your off hand.
Revving up the blaster by holding the acceleration trigger also turns on two LEDs in the magwell. These LEDs charge up any GITD darts that are loaded in the top of the mag.

As mentioned previously, the Jyn Erso blaster is actually quite large, eclipsing the Stryfe and even beating the Rapidstrike for barrel legnth. Making matters worse, the battery tray placement in the foregrip makes the blaster quite front heavy and unbalanced, especially in the absence of a stock.

Performance

How does the Jyn Erso Blaster perform? Does it keep up with Elite-era blasters?
Range is pretty poor, averaging only around 7-9m flat with near-full-charge batteries and the included Star Wars darts. Muzzle velocity is unimpressive, averaging around 50fps with those same batteries (data can be found here). About on par with other semi-auto grey trigger flywheelers.
Accuracy is nothing special, with a number of darts failing to make it through my usual testing doorway at ~8m. I'd estimate it at slightly worse than a typical Elite blaster, though with such little power it's hard to really compare.
Rate of fire is naturally its best attribute. By virtue of being a semi-auto flywheeler, a rate of fire of 5+dps is achievable with good technique, however will very quickly jam up a stock blaster from flywheel deceleration. About one dart per second is the most you can get while maintaining range.

Game Utility
As is per usual for a stock semi-auto flywheeler, the Jyn Erso blaster is best suited for closer range combat. At this range, its spin-up time is less of an issue, and its high ROF can be used to maximum advantage. Note that the blaster's length may pose an issue with maneuverability with close quarters, at least compared to shorter blasters like the Stryfe or Desolator. It suffers significantly at longer ranged combat due to its lack of power and long spin-up time. As is usual for a stock blaster, I personally find springers to be all round more effective, however there is no denying the dominance of flywheelers in "superstock" games.

Value and Summary
The typical retail price of the Jyn Erso blaster in Australia is around 90AUD. Sales can take them down to around 60AUD, however I bought mine at half price (45AUD) from BigW. Even for what I paid, I feel that it wasn't a particularly good deal. Sure the light and sound system adds some neat features to the blaster, however fundamentally it is just a standard semi-auto flywheeler, with no significant extras. This blaster is another victim of Star Wars price gouging, considering the Stryfe retailed at a mere 25AUD. Unless you are a die-hard Star Wars fan or absolutely love its design, I would recommend saving your money for other blasters.

Power: 2.5/7
Accuracy: 2.5/5
Rate of Fire: 4.5/5
Usability: 2.5/5
Value for Money: 1/5
Overall: 2.46/5

Personal Rating: 2.5/5 - besides the (rather fun) light and sound system, its Star Wars branding and design, the Jyn Erso blaster doesn't have a whole lot going for it compared to other semi-auto flywheelers.


Besides the lights and sound system, the Jyn Erso blaster internally is very similar to the Stryfe, or any other semi-auto flywheeler. If the lights and sound system is not a concern, the blaster can be overhauled in the standard way without issue, easily achieving the standard 110+fps with a full overhaul that a good flywheel setup can achieve. Safely running the lights and sound system off an upgraded power supply requires some method of voltage reduction, which is not difficult as the system is not an especially demanding one power wise. The method I will likely use is simply a voltage regulator, fitted into any one of the decently sized spaces in the shell. Some RF suppression may be necessary for the upgraded motors to keep interference to a minimum.

A link to the same post on BlasterHub: link

MHvZ Game Report 6/5/17

$
0
0

We had some solid games today at MHvZ. The on-off rain did dirsupt play a little, however we managed to miss the majority of it.
Gamemodes:
Regular:
  • (Regular) Survival - Standard HvZ gametype, humans try to survive for a given amount of time (or until the last human falls). Zombies are given access to upgrades at various times, we used Infectors at 5 minutes, Tanks at 10 minutes and Husk at 15 minutes. Last human to fall wins. 
  • Secret VIP - There are 3 special players in this game: the VIP, the General and the Traitor. The VIP is a human who the other humans are trying to protect and is restricted to a given area (we used the usual tambark area), while the Traitor is a zombie masquerading as a human. When stunned, zombies must move outside of the VIP's area before counting down their stun. The only person who knows the VIP's identity is the General, while all original zombies know the Traitor's identity. Everyone knows the identity of the General, making them the only guaranteed trustworthy human. The Traitor acts as a human, but can at any point do a single Traitor zombie tag, revealing that they are the Traitor, and thus turning into a regular zombie. Additionally, if a human hits another human, the hit human is stunned as if they were a zombie, however they can still fire their blaster. If the humans protect the VIP for a given period of time (e.g. 15 minutes), the humans win. If the zombies successfully tag the VIP, the zombies win. Zombie upgrades are unlocked on a timer like Survival, with Infectors available from the start, 5 minutes for Tanks and 10 minutes for Husk. If a human is hit by a grenade, they are instantly turned into a zombie. This is the only way to actively eliminate the Traitor.
  • Defence Survival - The three zombie upgrades of Infector, Tank and Husk are spread throughout three separated squares, about 2-3m wide. Zombies can pick up the upgrades if they touch the desired upgrade inside the squares. If a zombie is stunned within a square, they must move outside of the square before counting down their stun. Zombies are only allowed one upgrade at a time. Once all upgrades from a given square are removed, the zombies no longer have to leave that square to un-stun.
New/Infrequent:
  • Squad Survival - Humans are split into small squads. When hit by a dart, a human must respawn at a tree. During this time, they cannot shoot however are still vulnerable to zombies. Humans can respawn three times at a tree, after which another dart hit will turn them into a zombie. The last squad with surviving members wins. Zombie upgrades operate on timers, as with Regular Survival.

Zombie rules:
Zombies tag humans with their hands onto any body part, blaster, tactical gear, etc, turning the human into a zombie. If a human hits a zombie with a dart, the zombie is stunned for a count of 25. A human can also stun a zombie with melee, but only with a direct hit to the back.

There are 3 standard zombie upgrades/mutations/perks:
  • Infector - zombies get to use foam swords, pool noodles, etc. Tags with said foam melee weapons on humans count as regular tags. Said melee weapons can also be used to block darts. 
  • Tank - zombies get to use shields, which block darts. The shields cannot be used to tag humans, presumably as a precaution against shieldbashing which could cause significant injury. 
  • Husk - a zombie gets to use a ranged attack, in this case a Vortex Mega Howler. A ranged Husk attack counts as a regular zombie tag. The Husk may move from the place they were stunned to retrieve their ammo, but do not count down their stun timer until they return to their original stun place.
Zombie upgrades cannot be stacked, so a zombie can only have one upgrade at any time.
If in play, grenades can stun a zombie with a hit to a shield, and can be reused at will. If human vs human rules are in effect, a grenade hit to a human will turn that human into a zombie immediately.

Blasters:
Since there were a lot of different blasters there, I've generalised them and only listed down the ones that I saw as significant or noteworthy, or remember for that matter. Being that I can't be everywhere at once, it's entirely possible I completely missed some blasters.
Regulars/Recurring: 


Elite Stryfe (various motors, LiPos) - the standard semi-auto flywheeler at MHvZ. Compact, reliable and effective, they are one of the most popular blasters (if not the most popular blaster) at Melbourne events.


Elite Rapidstrike (various motors, LiPos) - the standard full-auto blaster at MHvZ. Capable of very impressive volumes of fire, though require a lot of trigger discipline and ammo to be effective over a longer time.
Elite Retaliator (various springs and mod kits) - the standard springer at MHvZ. Simple and reasonably effective, quite a few today were run still with the top slide prime, rather than an underbarrel pump grip. ROF is naturally a lot slower than a typical flywheeler, but is generally enough to get by in most combat situations with backup.
ZS Slingfire (upgrade spring) - sufficiently powerful for HvZ, with a usable one-hand prime useful when on the move. ROF is naturally quite slow, making maneuverability even more of a necessity for survival.
ZS Hammershot (various upgrade springs, cylinders) - there's always a lot of Hammershots at MHvZ, but during this event a lot more were actually used than usual. They are quite effective backup blasters, sporting enough capacity to fend off a couple of zombies, and a one-handable prime ideal for on-the-run combat and reloading.
N-Strike Rayven (upgrade motors, LiPo, full-auto pusher) - an overhauled Rayven fitted with an auto-pusher, making it perform similar to a Rapidstrike. A good amount of power with solid ROF, making it an all round very effective blaster.

Elite Firestrike (couplered, upgrade spring, speedloader) - a high power, compact single shot blaster. Effective at mid-to-long range potshots, ideal for scaring away far off zombies and covering fellow humans from further away. Vulnerable in close quarters due to a heavy prime and manual barrel changing making for a very slow ROF. Is typically used as a secondary to the Rayven featured just above.
?? Alpha Trooper (unknown mods, if any) - an out-of-box pump action springer, making for a solid entry-level blaster. Packs enough power for closer range combat, with a decent ROF

New/Infrequent:

Elite Rhino-Fire (unknown mods, suspected at least overvolt) - a blaster built purely for fun and silliness, this one was mounted on a camera tripod to be usable while standing up. Though not at all a practical HvZ blaster, it was quite fun to see in (30 seconds of) action.


ZS Sledgefire (singled, various upgrade springs) - high power, single shot springers. Effective at mid-to-long range fire support, especially useful for picking off unaware sombies from a distance. Vulnerable in close quarters and larger groups due to their single shot nature, necessitating backup or a secondary blaster for late-game survivability.
Doomlands Lawbringer (unknown mods, if any) - essentially a high capacity, oversized Hammershot. Has a similar one-handable prime ideal for on-the-run combat, and a much larger capacity than a typical Hammershot, allowing much better survivability against multiple zombies. The extra bulk does make carrying it a little harder, as well as hindering aiming and maneuverability a little.
N-Strike Modulus (unknown mods, if any) - unsure if any mods were performed to this blaster. Regardless, it would perform very similarly to a comparable Stryfe. I've included it here simply because it's quite rare to see the Modulus blaster in Melbourne events.
N-Strike Vulcan (unknown mods, if any) - much like the Rhino-Fire, a blaster more for fun and cool factor than anything else. Its capacity is decent at 25 darts with a standard belt, but the belt-feeding system is rather impractical, particularly when compared to mag fed blasters. Range is also not particularly good, and its ROF is easily matched and beaten with more popular blasters like the Stryfe.
N-Strike Stampede (unkown mods, suspected at least overvolt) - not a bad blaster as such, just outclassed by typical flywheelers. Range is roughly comparable to a spring upgraded Elite Alpha Trooper or similar, and ROF is decent, around 4-5dps.

Mega Rotofury (rebarreled, various upgrade springs) - high power springers capable of fairly fast successive shots, unlike the other high power springers featured. The 10 dart cylinder coupled with pump action allows a Rotofury to be much more effective against multiple zombies and in close quarters than the other high power springers. ROF wise they still pale in comparison to more conventional springers and flywheelers, but are quite effective at mid range combat.
We used the same play area as always, a large triangular grass area with some large trees and a tambark area in the middle. The temperature peaked around 20C, however dropped off quickly from rain. The majority of rain came during the lunch break, delaying play slightly and making the play area quite damp and a lot colder. Player count peaked at around 30, however varied between 25 and 30 throughout the day.


As usual, we started with a Survival round. As is standard for a Survival round, the zombies were generally unable to make any significant inroads into the human groups, only getting a few tags through poor situational awareness. The release of Tank shields at 10 minutes gave the zombies a more reliable way of pressuring the humans, giving them many more opportunities for tags. My group of humans started encountering significant combat when the human and zombie numbers were roughly equal. We took up the high ground to the north of the play area, and were easily able to fend off any zombie advances. Moving back and forth between the north-east and north-west corners, we were able to survive with minimal casualties long enough for the zombies to go off and hunt down other human groups.

The zombies returned not too long after, having tagged the majority of the humans, and outside of my group of humans there were few other survivors. Facing essentially a full zombie horde, we lost much of our group in the first few charges. One other human, along with myself, were able to escape the onslaught, and managed to survive on our own. A combination of firepower and coordination allowed us to fend off just about any zombie charge, and in particular coordination helped us in fighting off any Tanks. Eventually both of us ran out of darts and were overwhelmed by the sheer number of zombies.


We played two rounds of Secret VIP. In the first round, I was selected as the General, and selected the VIP as a player I knew could handle themselves, but not be too obvious a target. About 30 seconds into the game however, the Traitor chose to use their tag on me. Immediately joining the zombie horde, I told my fellow zombies who I had chosen as the VIP. I believe the VIP also chose to reveal their identity, at least to a couple of other humans. Without a Traitor to help us from within the human group, us zombies resorted to consistent head-on charges. For the most part, we would be hosed down before getting remotely close to the human group, though some of the other zombies were able to tag an unwary human or two.

The zombies really started to make progress once Tank shields were made available. With such a high density of humans, along with a grenade in the mix, a typical Tank charge was rarely able to tag any humans. While there were a few tags from the Tanks themselves, many more came from the rest of the zombies. Importantly, while the Tank themselves would typically get surrounded and hosed down, they would draw the attention of the majority of humans in the area. Furthermore, after successfully stopping a Tank, there would often be a short lull in human concentration and awareness as the humans regrouped from the Tank charge. This small gap in concentration was enough for many a zombie to get a sneaky tag or two. I myself was able to make at least two tags this way, and I am a very defensive and conservative zombie who rarely, if ever, makes any tags. The human group did survive fairly well considering, rarely leaving opportunities for a zombie to make more than one or two tags before hosing them down. In the final minutes of the game, we were able to tag the last few remaining humans, with the VIP being the very last human, for a tight zombie victory.

I was an ordinary human for the second round. For whatever strange reason, the General and a number of other humans elected to leave the tambark area completely, leaving the (still unknown) VIP and the rest of the humans. This tactic is very much ill-advised for larger groups of humans, as the VIP cannot leave the tambark area, leaving them much less well defended. In this round however, it acted as a useful distraction, drawing a lot of zombie attention away from the tambark area. This diversionary tactic worked well until Tank shields were released. The tambark zone, as a no-respawn area for the zombies, acts as a buffer against Tank charges, as you are guaranteed a certain range of relative safety. Outside of this tambark zone however, it is very easy for Tanks to relentlessly pursue and push back human groups, regardless of how well equipped they are. As such, the humans outside of the tambark zone quickly retreated back inside to regroup.

Once the humans returned to the tambark (or were tagged), the round went on as per usual. In comparison with the previous round, the human group was much more adept at maintaining situational awareness during and after Tank charges. A small group of humans would focus on the Tank(s) while the rest of the nearby humans would watch for other zombies. There were a lot less casualties to sneaky zombie strikes during and after Tank charges. As a result, even with the release of the Husk with 5 minutes remaining, the human group was able to maintain quite a solid defence, leading to a decisive human victory. I do not know what happened to the Traitor, but I do not recall any friendly fire occurring so I have to assume that they simply used their Traitor tag on someone without causing a commotion.


These rounds of Secret VIP really demonstrated the effect that Tanks can have on human groups. Even with extra zombies, a Tank charge is not particularly threatening to a human group that is well coordinated and prepared. However the mere act of a Tank charging at a group of humans can easily disorient the humans, often making them easy pickings for the Tank and any other zombies nearby. As I've mentioned many times previously, Tanks are by far the biggest threat to humans. This is not just because of the combat advantage they have one-on-one, but also the psychological factor and the attention they draw. It is extremely important for any humans engaging with Tanks to constantly keep an eye on any other nearby zombies. Any lapse in concentration and awareness can easily spell doom for human players if there are any zombies nearby. It was this that brought the zombies victory in the first round.

Conversely, as I have described before, I have successfully fended off Tanks and a large number of zombies with the help of just a few fellow humans, sometimes even just one other human. Instead of focusing on the Tank from the get-go, our usual strategy involves stunning as many other zombies as possible, giving us the space and freedom to easily push back the Tank at our own pace. This tactic really demonstrates the vulnerability of Tanks when faced with multiple humans alone, as while they can easily block and approach a lone human, they can't block multiple directions at once. In the second round, Tank charges were often performed with a lot less secondary zombie backup, and as a result could be picked off and stopped much more easily.


Another contributing factor was Tank placement. In the first round, the two Tanks were usually far away from each other, often on opposite sides of the VIP's area. As such, a simultaneous Tank charge could disorient and divide the human group in the middle, greatly reducing the effectiveness of the human defences. In the mayhem and chaos, there were often also many opportunities for any unnoticed zombies to slip in and tag some humans. Conversely, in the second round, the two Tanks spent some time together, essentially forming a super-Tank. While this offered the Tanks and nearby zombies superior protection, it was also much easier for the humans to focus on, and many a Tank push was repelled by flanking humans.


I also feel that the Traitors did not make full use of their abilities. In the first round, the Traitor immediately revealed themself to tag me as the General, leaving the humans without the threat of an attack from within. As a result, the zombies struggled early on to make inroads into the human defences, and the game ended very close to the 15 minute timer. I believe that a general lack of situational awareness cost the humans the game; a few extra stuns here and there, and the humans may well have survived just long enough.

This was shown even more obviously in the second round, where the zombies failed to make significant inroads for the entire round. A Traitor attack from within just before a Tank charge is one of the best ways for the zombies to shatter the human defences, and I've seen it executed extremely well in previous events. In the second round, timed well it may have been enough for the zombies to get the upper hand and tag the VIP. Instead, what I saw was one of the most decisive human victories in a Secret VIP round.


We played a round of Defence Survival after Secret VIP. I grouped up with a couple of humans to defend the Husk square, leaving the rest of the humans to guard the Tank and Infector squares. Since only one zombie went for the Husk, we were able to hold him off for quite a while. The rest of the human defences were not as solid however, with the Infector square being the first to be lost. Some of the zombies moved up to help with the Husk square, while the rest pushed for the Tank square. By this time the zombie horde had grown to around 8-10 players, possibly more.

We were able to hold off the zombies from the Husk square until approached by Tanks from the newly-liberated Tank square, after which we retreated. We moved to link up with some of the surviving human groups, however a lapse in situational awareness allowed a zombie to approach from behind and tag us. The remaining human groups didn't fare too well, being tagged out within just a few more minutes.

In general it was poor situational awareness and coordination that caused such a quick collapse of the human group. While there is not much that can be done defensively once the Tank square has been breached, the remaining humans could and should have linked up quickly. Once regrouped, the humans would have had a much better chance at surviving for a decent amount of extra time. Instead the separate human groups were much more easily and quickly picked off by the ever-growing horde.


We ended the day with a Squad Survival. My squad of humans moved up north, and were quickly targeted by the starting zombies. We were able to fend them off, however had to keep moving to avoid the other human squads. After some time, with the release of Tank shields, my squad was again targeted by the zombies, and in a lapse in coordination, two of our humans were tagged. The remaining three squad members, including myself, were able to escape, however were pinned between two hostile human groups who were working with the zombies. Being forced through the branches of a large tree, we were caught by some zombies, and in some incredibly poor situational awareness, were quickly all tagged.

The human competitivity of Squad Survival drastically shortens its play time compared to other Survival gamemodes. The humans are limited to much smaller groups than usual, and have to contest with one another, not just the ever-present zombie threat. The human vs human aspect freely boosts zombie numbers, while also adding an extra threat and distraction, which all give the zombies a massive advantage compared to other Survivals. Not only is it far easier for zombies to tag unsuspecting or distracted humans, but their numbers also grow from the humans fighting one another. The added human competitivity also adds some variety to the game and the event, which some players particularly enjoy. While I personally prefer the purely humans vs zombies gamemodes, I certainly don't mind the variety or faster paced rounds of Squad Survival.


You can find the same post on BlasterHub: link

Quick Review: BlasterTech Stryfe Motor Cover and Grip Extension

$
0
0

Received a package of parts from BlasterTech today, a Stryfe motor cover, a Stryfe grip extension, and two Meishel 2.0 motors. I'll be installing the Meishel 2.0s into my Jyn Erso blaster at some point, but the Stryfe parts I could install immediately.

First up is the motor cover. It's a fairly good looking piece, fairly sleek and low profile, though also kept rather simple. Like most other motor cover designs, it has some holes on the top, however notably has a number of gaps around the sides.

The underside of the motor cover has plenty of space for the motor terminals of a 180-sized motor and all the necessary wiring and soldering.

Compared to a BSUK Stryfe motor cover. Besides obvious stylistic differences, the BT motor cover lacks the sharp outside edge that makes the BSUK cover notably and annoyingly uncomforable.


Installed on my Stryfe, the BT motor cover is quite well shaped and suits the Stryfe body design nicely.

Focusing on the aforementioned gaps in the side. This shot also shows off how much extra space the motor cover provides, with the motor terminals being nowhere near the inside surface of the motor cover.
The BlasterTech Stryfe motor cover works just fine as a 180 motor cover, with the one caveat of the side gaps exposing the motors and wiring to a little more of the elements and the environment than most other motor covers. Besides that potential issue, I quite like the design of it. As is the case for the majority of motor covers, whether you use the BT motor cover or another design is almost entirely personal aesthetic/stylistic preference. The BT Stryfe motor cover is sold for 10AUD.


The more interesting piece in this package however is the Stryfe grip extension. This is a piece designed to fill in the sling point in the Stryfe's handle, making the effective handle overall much larger.

It's a two part, symmetrical piece held on by friction and a single screw.

Here's the grip extension installed on my Stryfe. It's a very simple installation, simply unscrew it, fit it around the sling point and reinstall the screw. Naturally this also makes it completely removable if desired.
Here's my hand on the now-extended grip. Despite never having any real issue with the Stryfe handle previously, I immediately noticed and appreciated the difference that the grip extension made. With so much more effective handle length, the Stryfe's handle is a lot more comfortable, especially for larger hands.

Besides the obvious loss of the handle sling point, I have one particular, though minor, complaint with the Stryfe grip extension. Presumably due to the printing process, the bottom edges of the grip extension are a little sharper than ideal. This is of course easily fixable with a few minutes with some sandpaper.
If you don't use the handle sling point of your Stryfe or find the grip of the Stryfe at all uncomfortable, I would definitely recommend giving the BT Stryfe grip extension a look. It makes the handle as a whole much larger and more comfortable without affecting its length or handling. Even if you do use the handle sling point, I would still recommend considering the grip extension and changing your sling setup (if possible) if you find the handle too short or uncomfortable. The BT Stryfe grip extension is available for 9AUD.


Finally here's an overall shot of my Stryfe with its new additions. It contains parts from a range of different aftermarket suppliers, including BlasterTech (of course), Jase3D, Artifact, and Worker. The motors, which are currently Blade 180s (FK180SH-3240), will likely/hopefully be replaced with newer 2S motors that have longer shafts, though I have yet to select a replacement, in hopes of an ideal 2S 180 motor becoming available.

Quick Mod: Jyn Erso Blaster with Meishel 2.0s

$
0
0

In my order from BlasterTech not long ago, I received a pair of Meishel 2.0 motors made by FoamBlast. My Jyn Erso blaster had been waiting for upgrade motors for a while since I'd actually run out of suitable 130s, so I took this opportunity to get my Jyn Erso blaster modded while also testing out these new motors.

I quickly went about removing all of the internals from the Jyn Erso blaster. It was a relatively simple process, though the light/sound system added a number of extra internal components that also had to be fished out and removed. Once everything was out of the blaster, I came across the first major issue. The motors were glued into the flywheel cage, which made their removal significantly more difficult.
After disassembling the motors while still glued into the flywheel cage, I was left with just the motor cans in the cage. Using a set of needle-nose pliers, I was able to push the motor cans out of the cage, leaving just glue residue.
Some quick work with a rotary tool and a blade cleared out the flywheel cage enough for me to fit the Meishel 2.0s in. Since they are 130 sized motors, no further shell modification was necessary.
The second major problem was fitting a microswitch into the handle. On top of the handle being quite small, the clip-in grey handle pieces also meant that there was a lot of extra internal plastic that had to be removed to fit the switch and the wires. After a lot of trial-and-error and some annoyance, the switch was installed in a good position, and works nicely with the rev trigger.
Meishel 2.0s are spec'd to be run on a 2S LiPo (~7.4V nominal) as flywheel motors, so I repurposed my Desolator's LiPo (2S 850mAh 25-40C Turnigy Nanotech) for the Jyn Erso Blaster. Technically speaking, this LiPo is a little weaker than ideal, with Meishel 2.0s pulling around 19A each at stall at 7.4V (source), while the LiPo is only rated to 34A burst. I have yet to notice any difference when comparing this LiPo and my 2S 500 mAh 65-130C Turnigy Bolt (rated to 65A burst). It is certainly not ideal however, and I may end up using the latter LiPo to avoid overdrawing. Both LiPos fit without issue in the Jyn Erso blaster's battery tray once cleared out, and if necessary the battery tray itself could be removed entirely for even more space.
All wired up, ready to go. Since the Jyn Erso blaster is a standard semi-auto flywheeler, internally it is very simple and did not take too much effort to complete. The potential issues with modding it are glued-in motors, the lack of space and necessary shell clearing in the handle for a microswitch and perhaps

The last issue concerns the light/sound system. Since it is spec'd to be run off of 4 AA batteries, running it on a 2S LiPo presents the serious risk of damaging, if not destroying, the circuitry. For now I've left it out of the blaster. I have plans to re-install it using a voltage regulator to stop the control circuit from toasting and an on/off switch somewhere. I have the voltage regulator on hand, and simply need to figure out a good position for the on/off switch and solder and (re)install all the components.

After firing around 150 blue Koosh through, I chrono'd the blaster with some of my grey Koosh, with results in the newest tab of my Chrono results document. I'm pretty happy with the results. It roughly matches up to expectation, falling a little short of a similar spec'd Stryfe which is expected from the long faux barrel.
I'm pretty happy with the Meishel 2.0 motors so far. They have a reasonable spin-up time and hit a very nice speed range. Coupled with a reasonable price at 5AUD via BlasterTech (3USD directly from FoamBlast), from my (limited) experience so far, they are a very solid motor and I would definitely recommend them as a 2S flywheel 130 motor.
I will be combat testing the Jyn Erso blaster with its new Meishel 2.0 motors at the next MHvZ.

MHvZ Game Report 8/7/17

$
0
0

We had a great turnout at MHvZ today, which resulted in some rather impressive hordes. We also tried out some new gamemodes.

Gamemodes:
Regular:
  • (Regular) Survival - Standard HvZ gametype, humans try to survive for a given amount of time (or until the last human falls). Zombies are given access to upgrades at various times, we used Infectors at 5 minutes, Tanks at 10 minutes and Husk at 15 minutes. Last human to fall wins. 
  • Secret VIP - There are 3 special players in this game: the VIP, the General and the Traitor. The VIP is a human who the other humans are trying to protect and is restricted to a given area (we used the usual tambark area), while the Traitor is a zombie masquerading as a human. When stunned, zombies must move outside of the VIP's area before counting down their stun. The only person who knows the VIP's identity is the General, while all original zombies know the Traitor's identity. Everyone knows the identity of the General, making them the only guaranteed trustworthy human. The Traitor acts as a human, but can at any point do a single Traitor zombie tag, revealing that they are the Traitor, and thus turning into a regular zombie. Additionally, if a human hits another human, the hit human is stunned as if they were a zombie, however they can still fire their blaster. If the humans protect the VIP for a given period of time (e.g. 15 minutes), the humans win. If the zombies successfully tag the VIP, the zombies win. Zombie upgrades are unlocked on a timer like Survival, with Infectors available from the start, 5 minutes for Tanks and 10 minutes for Husk. If a human is hit by a grenade, they are instantly turned into a zombie. This is the only way to actively eliminate the Traitor.
New/Infrequent:
  • Zombie Payload - A zombie is designated as the "Payload", and carries a bucket as an indicator of this status. They cannot run, however otherwise behave as an ordinary zombie. The objective of the zombies is to escort their Payload from the start zone to the end zone. The humans will attempt to hold off the Payload from reaching the end zone. If the Payload reaches the end zone within 15 minutes, zombies win. If the Payload does not reach the end zone by 15 minutes, humans win. Zombie upgrades are made available at 5/10 minutes ala Secret VIP.
  • Bounty Hunt - Three humans are designated as VIPs, known to all players, and allocated a particular zombie upgrade. If a VIP is tagged, their allocated zombie upgrade is made available immediately. The game otherwise operates like a standard Survival round. In the second round of Bounty Hunt, a Traitor was added, operating on the same rules as in Secret VIP.
Zombie rules:
Zombies tag humans with their hands onto any body part, blaster, tactical gear, etc, turning the human into a zombie. If a human hits a zombie with a dart, the zombie is stunned for a count of 20. A human can also stun a zombie with melee, but only with a direct hit to the back.

There are 3 standard zombie upgrades/mutations/perks:
  • Infector - zombies get to use foam swords, pool noodles, etc. Tags with said foam melee weapons on humans count as regular tags. Said melee weapons can also be used to block darts. 
  • Tank - zombies get to use shields, which block darts. The shields cannot be used to tag humans, presumably as a precaution against shieldbashing which could cause significant injury. 
  • Husk - a zombie gets to use a ranged attack, in this case a Zing bow. A ranged Husk attack counts as a regular zombie tag. The Husk may move from the place they were stunned to retrieve their ammo, but do not count down their stun timer until they return to their original stun place.
Zombie upgrades cannot be stacked, so a zombie can only have one upgrade at any time.
If in play, grenades can stun a zombie with a hit to a shield, and can be reused at will. If human vs human rules are in effect, a grenade hit to a human will turn that human into a zombie immediately.

Blasters:
Since there were a lot of different blasters there, I've generalised them and only listed down the ones that I saw as significant or noteworthy, or remember for that matter. Being that I can't be everywhere at once, it's entirely possible I completely missed some blasters. As there were a lot more players this eventl, I quite possibly missed a lot more blasters than usual.
Recurring/Regulars:


Elite Rapidstrike (various motors, LiPos) - standard high ROF blaster for MHvZ. Capable of excellent volume of fire at decent range, however requires good trigger control and a lot of ammo to keep in check.


Elite Stryfe (various motors, LiPos) - standard semi-auto flywheeler for MHvZ. Simple, dependable and very effective in the right hands, Stryfes are very popular for good reason.
Mega Rotofury (rebarreled, various upgrade springs) - a fairly popular high-power blaster. When rebarreled for regular darts, the Rotofury can be very powerful, effective at flinging darts at mid-to-long range with the right darts. The Koosh darts we use at MHvZ do limit their usefulness at longer ranges a fair bit however, being rather unstable at such speeds and unfriendly to long barrels. Its relatively low ROF compared to most other popular blasters also makes them more vulnerable in close range or against multiple zombies.
ZS Slingfire (unknown mods if any) - a fairly standard manual-action mag-fed blaster. Outside of its main niche of being one-handable, it is largely outclassed by other, more popular options such as the Retaliator.


Elite Retaliator (various springs, pump grips) - the most popular mag-fed springer at MHvZ. A solid, compact blaster with massive aftermarket parts support, capable of turning it from a large pistol into a fairly powerful pump action rifle blaster. It is beaten for power and ROF by a number of blasters, however in my opinion it is the most balanced springer that is readily available, at least in Australia.

Buzz Bee Sentinel (unknown mods if any) - a lever-action blaster that is very powerful out-of-box. Compared to the Slingifre, it is much harder to one-hand prime, however packs a whole lot more power and is much more competitive with more popular blasters like the Retaliator. Its lever action does keep its ROF low however, making it much more difficult to use in close quarters, or against multiple zombies.

N-Strike Modulus (unknown mods, assumed overhaul) - essentially just a bulky Stryfe, with similar performance in a much larger shell. The handle is notably uncomfortable, however the battery tray in the foregrip provides a much larger space for a LiPo than the Stryfe.
Elite Rampage (unknown mods if any) - a solid mag fed blaster that is pump action out-of-box. Its main issue is the side magwell, which is rather unbalanced, unfriendly for left-handers, and a little awkward for maneuvering. It is a little behind the Retal for power, however I find the Rampage to be better for rapid-fire.
ZS Sledgefire (singled, upgrade spring) - a high power single-shot blaster. A fairly simple but fun and powerful blaster that is quite effective for mid-to-long range potshots. Its single shot nature makes it very vulnerable against multiple zombies and in close quarters combat.

New/Infrequent:

Jyn Erso Blaster (Meishel 2.0s, 2S LiPo) - brought this along to test out not only the Meishel 2.0s, but also the Jyn Erso blaster itself as a semi-auto flywheeler. Both performed acceptably, but not exceptionally. Meishel 2.0s are perfectly adequate as a 2S flywheel motor, with decent spin-up time, a good speed range and non-extreme current draw. I have no issues with them and would definitely recommend them for their intended role.
The Jyn Erso blaster performed about as expected, being noticeably but not unusably worse performance wise compared to my other flywheelers with aftermarket flywheels. It does have some notable usability issues that in my mind put it behind most of the other semi-auto flywheelers. Firstly is its somewhat awkward design, with a rather small handle and an awkwardly placed foregrip that make holding it a little uncomfortable. A particular issue I had was how easy it is to accidentally press the rev trigger due to the handle design and the significant front weight. Additionally, the magwell is rather tight, and this coupled with the right-side-only mag release can make it a little more difficult to change mags. This coupled with the front-heavy design made it much more awkward and difficult to switch mags compared to most other flywheelers. Finally, the Jyn Erso blaster is not compatible with F10555 Pmags due to the magwell area design, which I discovered to my dismay on the field.


Rival Artemis (assumed stock) - my first time seeing these in person, they are a very solid out-of-box Rival springer, and a pretty good stock blaster all round. Good capacity that is easily topped up on-the-fly (though difficult to fill from empty/near-empty), quite good stock range and accuracy as is expected from the Rival line, and pump action with slam-fire for a solid ROF. Compared to a typical overhauled Stryfe (or similar modded superstock blasters), the Artemis is a little outclassed, but for stock blasters, it's certainly a very good one.


Air Zone Tripleshot/Lanard Shotgun (complete overhauls) - these things are absolute monsters, each with 3-dart inline clips for each barrel. The yellow one packs the standard 4 barrel arrangement of a typical "Quadshot" for a total capacity of 12 darts, while the beige one uses an 8 barrel arrangement for a total capacity of 24 darts. Packing an impressive amount of power, these things are capable of effective shots at ranges well beyond most other blasters, however were largely mitigated again by the use of Koosh, which are rather unstable and inaccurate at such speeds.

Elite Hyperfire (various, unknown mods if any) - generally speaking, in my opinion, a worse Rapidstrike. The stock canted flywheel cage presents a serious issue, at least with Koosh darts (which as mentioned are the dart of choice for MHvZ), with a much higher chance of spinning them out than a straight cage, though this is less of an issue at lower speeds. I found the belt feeding mech to be far less reliable than a pusher as well. That said, there aren't many Hyperfires that see use at MHvZ, and those that do are rarely put through as comprehensive combat testing as Rapidstrikes often are.


Dart Tag Swarmfire (unknown mods if any) - a rather old, though still quite effective blaster. Provides fairly slow full-auto fire when stock, though packs a solid punch for a stock blaster. Its main draw besides easily upgradeable full-auto is its on-the-fly-reloadable 20 dart turret, which is a decent capacity, easily enough to fend off small groups of zombies. Though a pain to fill up when empty, the Swarmfire can be a novel and rather effective option as a non-mag-fed full auto blaster when modded.


Doomlands Desolator (unknown mods, assumed overhaul) - as mentioned in previous posts, essentially just a Stryfe with a fancy body kit. A very solid all-round blaster.

N-Strike Vulcan (unknown mods if any) - Used purely for cool factor rather than anything else, with its only notable feature being a higher-than-average capacity. Struggles compared to most other popular blasters without major work (usually involving a flywheel afterburner).

Rival Apollo (pump grip) - didn't see any combat use, it's just the first time I've seen an Apollo with a pump grip.

Caliburn (homemade blaster) - also didn't see any combat use as it is far too powerful for MHvZ, but again included because I haven't seen one before and it's pretty cool.

Elite Disruptor (upgrade spring) - essentially a Strongarm that is more convenient to reload, which in itself is still a very useful improvement. Works well as a sidearm blaster, with enough capacity, power, and a good enough ROF to fend off a few zombies quite comfortably.


Same play area as always, with all of the deciduous trees losing their leaves thanks to the winter. This resulted in some of the trees losing a lot of their effectiveness as cover. It was relatively cool, as is typical for a winter Melbourne day, with cloud cover but only the slightest hint of rain. We had a big turnout today, peaking at around 45 players, which is one of the highest, if not the highest, turnout I've seen.


We started off the day with a standard Survival round. It played out as per usual for Survival, with the humans surviving with minimal losses until Tank shields were made available for the zombies. Tanks are by far the most effective tool that the zombies have for splitting up human groups, and smaller, isolated human groups (especially lone humans) are much easier for zombies to pick off. I was able to survive until the end of the game, primarily by avoiding the main human groups and their pursuing zombies. In this way I was usually only targeted by a small number of zombies at any one time, and very rarely drew the attention of the Tanks. With human numbers dwindling and the zombie horde growing to an impressive size, I inevitably became the target of many zombie attacks. I survived to be the last human standing, eventually dumping my now-empty Jyn Erso blaster and using up all the darts in my Sweet Revenges before being tagged.

We played a round of Secret VIP afterwards. The early game progressed as per usual for Secret VIP, with the zombies getting few, if any tags in the first five minutes. The release of Tank shields allowed the zombies to more effectively push into the human's tambark zone. Successive Tank charges yielded very good results for the zombies, often catching much of the human group off guard or forcing them to scatter, opening the door for opportunistic zombies to move in for some easy tags. The new Husk contributed a significant factor as well, being capable of tags from well behind the zombie ranks. These contributed to the human group dwindling rapidly in the last few minutes of the game. I was tagged near the end of the game during a moment of poor situational awareness, distracted by an incoming Tank. With less than ten humans remaining, the zombies were able to tag the VIP in one of their many charges, ending the game with a zombie win.

A significant contributor to the zombies' success was the effectiveness of their Tank charges, or conversely the inability of the human groups to combat them. In past Secret VIP rounds, a well coordinated human group could easily split up and force back a Tank charge while other nearby humans protect them from nearby zombies. In today's round, a Tank charge was usually met with much of the human group running and scattering, completely breaking formation and defensive solidity. This not only gave the Tanks much more time in the tambark, but also far more opportunities for nearby zombies to take advantage of. All too often I would hear a commotion from a different side of the tambark, and turn to see a large group of humans all running from a lone Tank. The Tank would eventually be stunned of course, but the humans would end up scattered all over the place, often with many arcs uncovered. Any nearby unstunned zombie could (and often did) take advantage of this gap to nab an easy tag or two before inevitably being hosed down.


After the Secret VIP round, we began a new Six Dart Survival pickup gametype, however I personally have become severely disillusioned with the effectiveness and fun of such games. Several of us players have found it much faster more effective and to perform a proper pickup sweep, allowing for proper gametypes to be played more quickly. As such, while the other players were being briefed on this new gametype, we instead began to sweep up some of the lesser-explored areas of the play area. By the time this game started, we had finished sweeping the north-west corner, and had split up to cover the northern-most area and the western-most side. Once these sweeps were done, with the majority of the remaining darts in areas often occupied with players, I took an early lunch break.


After the lunch break, we tried the new gamemode Zombie Payload. The zombies started in the southern most corner of the play area, with the end zone being designated as the central tambark area. The first couple of minutes were quite a mess. The zombies spent most of their time stunlocked by barrages of darts from an essential wall of death of humans, and with no way to avoid it. Any zombies who did manage to avoid the crossfire could do little to the humans, being hosed down by darts as soon as they approached. During this time, the Payload made slow progress, spending far more time being hit by darts than actually moving. While a few zombies may have achieved tags on unwary humans, for the most part the zombies made very little progress, much like in most other gametypes. Naturally that changed when zombies were given access to Tank shields at the five minute mark.

With Tanks, the zombies could actually threaten and push back the humans, nabbing many more tags while also clearing the way for the Payload to move forward. They could easily and effectively scatter the human groups, clearing the way not only for the Payload to move forward, but also for other zombies to make some easy tags. They also drastically reduced the effectiveness of the human wall of death formation. With Tanks in play, the Payload had a much easier time moving forward. Between the always dangerous Tanks and ever-growing zombie horde, it became increasingly difficult for humans to get near enough to the Payload to stun them. Couple that with the relatively short distance between the start and end zones, and a zombie victory was all but inevitable. The last minutes of play saw the humans pushed further and further away from the Payload, leaving them clear to move to the end zone.

I personally didn't like this gamemode. It heavily promotes stunlocking of zombies, which I personally do not enjoy, either as a human or zombie. Defence Survival has a lot of stunlocking due to its defence objectives, however I personally find that gamemode to be a little better in its stunlocking aspect. In Defence Survival, zombies are limited in how close they can "creep" (move forwards in between near-constant stuns) towards the defence objectives, as they must leave the defence squares to count down their stun. This gives a minimum of around 1-2m between zombies and the zombie upgrades in the squares. In turn, this means that the humans do not have to hose down zombies to ensure the objective remains safe, they simply need to react in time to prevent the zombie from reaching the upgrades. In Zombie Payload however, there is no limit to how close the Payload can "creep" towards the end zone. The Payload can creep forward slowly even with near-constant stunning from guarding humans, and depending on the time limit and distance between start and end zones, may even be able to reach the end zone just by "creeping". There is no way for the humans to reliably further slow down or completely stop the Payload short of a constant barrage of darts, which I consider to be very boring and un-fun for both sides.

For Payload type gamemodes, I feel that there needs to be a way for the Payload to be completely and reliably stopped. More importantly, they should also be stoppable without resorting to mindless or overkill tactics such as constant dart hosing, which to me suggests poor game design. The Payload itself should not be able to slowly inch forward of its own accord, certainly not still while confronted with a large group of humans. Rather, a Payload more akin to the Bomb in the old Blind Bomber gamemode (a separate game piece that is carried by a human), or even just more like Payloads in shooter games (think Overwatch or TF2, Payloads that only move when members of the appropriate team are nearby) would make for a much more competitive and fun game. Of course a lot of alteration would be necessary to make a Zombie Payload gametype work, given the drastic imbalance in teams, but I do not think the gametype currently is competitive or fun.


After the Zombie Payload round, we tried two rounds of Bounty Hunt. The first round of Bounty Hunt did not have a Traitor, while the second round did.
The game progressed much the same as a normal Survival round, just with the zombies more focused on the VIPs instead of targeting whichever human group they felt like. In turn, the humans were also grouped a little more tightly than usual, with more focus of actually protecting a particular human rather than just survival. Once all the VIPs were tagged and all the upgrades made available (in particular Tank shields), the game turns into just a standard Survival round. The difference is all in the mid-game, in how and when the zombies acquire the upgrades.

In the first round, although the Infector VIP was tagged relatively early, the zombies generally struggled to make much impact on the human groups. Although I wasn't paying attention to the time, I'm fairly sure the zombies didn't get access to Tank shields until well after 10 minutes of game time. Even when they did get access to Tank shields, I believe it was due to a miscommunication as I know the Tank VIP was still alive at that time. What this highlighted though was the need for the zombies to have some kind of "bunker buster" that wasn't just Tanks for this gametype. In most games, the zombies can rely on getting access to Tank shields at some point during the game. This gives them a relatively reliable method of scattering and disrupting most human groups. In Defence Survival, though acquisition of the Tank shields is not guaranteed as such, it is near guaranteed that at some point the humans defending the Tank square with have a lapse of concentration, giving a zombie the opportunity to dive in and grab a shield.

In Bounty Hunt, since the upgrades are tied to particular human players, it is possible that the zombies may never get access to a particular upgrade. If a VIP is the last survivor, the zombies will never get access to that upgrade during that round. This leads to a potential problem - if the Tank VIP is particularly good or lucky, the zombies may not get access to Tank shields until very late in the game - if they even get them at all. This can drag out the game for a very long time. As has been written about many times, Tank shields are central to the zombies' ability to threaten the larger groups of humans. Without Tanks, the zombies often struggle to make any impression on large human groups, as they are far too easily hosed down if they get too close. As such, I felt that in Bounty Hunt, the zombies should have some other method of human group disruption to compensate for the no longer guaranteed Tank shields. I suggested the implementation of a Traitor, which was implemented in the second round.

The idea behind using a Traitor as a "bunker buster" in Bounty Hunt is that it guarantees the zombies at least one of the upgrades, ideally the Tank shields. In the second round, it was in fact not the Traitor, but poor situational awareness, that got the Tank VIP tagged. The zombies focused their efforts on the human group with the Tank VIP, and were eventually rewarded when the Tank VIP strayed too close to zombies coming to the end of their stun time. A Traitor is quite a sub-optimal solution for Bounty Hunt however. In Secret VIP, a Traitor prevents the VIP from being too open about their identity, and introduces some paranoia and discord into the human group. This works for Secret VIP because of the anonymity of the VIP, the short round timer and the relative safety of the VIP's tambark zone. In Bounty Hunt, the three VIPs are known to everyone and this automatically makes them prime targets. It is not unreasonable for the Traitor to stick with the Tank VIP, and immediately tag them at the start of the game. This is rather un-fun for both the Tank VIP and the human group, as the humans have no real way of stopping this short of an exclusion zone around each VIP. I do not know what would make a better "bunker buster", however I believe that with a suitable special zombie, Bounty Hunt could become a solid staple of MHvZ, like Defence Survival.


I would like to also discuss the Zing Bow Husk that was used in this event. In the most recent set of events, the Husk has been equipped with a single Vortex Mega Howler. I believe that the Husk is meant to keep humans on their toes, and serve primarily to distract/disrupt the humans. It should be effective against humans who not wary, however it should not be very effective in direct combat. The Husk should not be a direct threat to humans in the same way Tanks are, or a blaster would be. I consider the Vortex Mega Howler Husk to be the best implementation so far. It is quite obvious, both on the field and in flight. With a good throw, it can travel quite far with surprising accuracy. It is very difficult to hit an alert human with it, given its travel time and loud whistling noise, however it can easily draw the attention of humans and help to dirsupt human formations. In direct combat, the Vortex Mega Howler is not particularly effective as it is difficult to get a good throw off while under fire.

The Zing Bow is also capable of quite good range and accuracy. Compared to the Vortex Mega Howler however, Zing arrows are much less obvious and much more effective as a ranged weapon. They are much smaller and produce a much quieter whistling noise. Zing arrows also travel significantly faster, and with multiple arrows available, can be reloaded and fired again very quickly, making the Zing Bow much more effective in direct combat. This effectiveness as a ranged weapon overall is my biggest problem with the Zing Bow as a Husk weapon. While the zombies having a ranged weapon is not a problem in itself, the Zing Bow is too effective a weapon and blurs the distinction between humans and zombies too much. Past Husks such as the Vortex Mega Howler, and various rocket launchers, have worked as Husk weapons because they do not compete with human armament for ranged combat, and when pitted directly against most blasters, will not fare well. This is not the case for the Zing Bow, which has the range, accuracy and refire rate to compete with blasters, at least far better than the other Husks. As such, I believe that the Zing Bow is not suitable for Husk use, or at least not the Husk as it is implemented at MHvZ.


I quite enjoyed today's event, a lot of players made for some rather intense Survival games and quite a claustrophobic mess in Secret VIP (as intended). I think Zombie Payload needs a lot of work to be a good gametype, and Bounty Hunt could do with some kind of new zombie in lieu of Tank shields not being guaranteed.

A link to the same post on BlasterHub: link

Quick Mod: MTB Neo Rhino Prototypes

$
0
0
While visiting the guys at MTB, I was given prototypes of some new MTB motors, Neo Rhinos and Neo Hellcats. These motors have a different wind to the regular Rhinos and Hellcats, as well as fancy new motor cans and neodymium magnets. The Neo Hellcat prototypes I received are unfortunately lacking the neo magnets, however the Neo Rhinos had them so I threw that pair into my Bullpup RS to try out at yesterday's MHvZ.


The Neo Rhinos had no issues fitting into my Artifact red cage, or using my Artifact gen 2 plastic flywheels. I installed them the night before HvZ and ran them for most of the day's games.

Neo Rhinos and Hellcats are spec'd to spin at the same (no-load) speed as regular Rhinos and Hellcats, but with far higher torque. While these motors don't currently have torque specs, I do know their approximate stall currents. Neo Rhinos have a stall current of around 25A, while Neo Hellcats have a stall current of around 35A. That coupled with powerful neodymium magnets give these motors a far higher torque than their regular counterparts, though of course at an increased (to-be-determined) price.

In my experience with Neo Rhinos, as expected I found them to spin-up much faster than regular Rhinos, and I believe they are comparable to, or even perhaps slightly faster than, Hellcats for spin-up time. This is based purely off ear however, so in the absence of actual torque numbers, take that with a grain of salt. I also found them to produce a much more harmonious noise than my old Hellcat pair, though that is likely just down to a bit of luck with motor matching.
Muzzle velocity wise, they produce around the same as my old Hellcats did, perhaps a little bit higher from being better matched. Chrono data is here.

Naturally, with such high current draw, these Neo Rhinos (and of course Neo Hellcats as well) can be expected to drain battery power much faster than regular Rhinos and Hellcats. Furthermore, significant heat generation may become an issue, especially with certain plastic flywheel cages that could soften and warp from the heat.

Neo Rhinos are so far proving to be a very good (but very power hungry) 130 motor, producing what seems to be an incredible amount of torque for its size (pending exact torque numbers). I am eagerly awaiting the opportunity to try out Neo Hellcats as well.

MHvZ Game Report 5/8/17

$
0
0

Another game at Melbourne HvZ. We had some pretty good games and a solid turnout, and I had an opportunity to give some of the new Buzz Bee blasters a go in combat.
Gamemodes:
Regular:
  • (Regular) Survival - Standard HvZ gametype, humans try to survive for a given amount of time (or until the last human falls). Zombies are given access to upgrades at various times, we used Infectors at 5 minutes, Tanks at 10 minutes and Husk at 15 minutes. Last human to fall wins. 
  • Secret VIP - There are 3 special players in this game: the VIP, the General and the Traitor. The VIP is a human who the other humans are trying to protect and is restricted to a given area (we used the usual tambark area), while the Traitor is a zombie masquerading as a human. When stunned, zombies must move outside of the VIP's area before counting down their stun. The only person who knows the VIP's identity is the General, while all original zombies know the Traitor's identity. Everyone knows the identity of the General, making them the only guaranteed trustworthy human. The Traitor acts as a human, but can at any point do a single Traitor zombie tag, revealing that they are the Traitor, and thus turning into a regular zombie. Additionally, if a human hits another human, the hit human is stunned as if they were a zombie. If the humans protect the VIP for a given period of time (e.g. 15 minutes), the humans win. If the zombies successfully tag the VIP, the zombies win. Zombie upgrades are unlocked on a timer like Survival, with Infectors available from the start, 5 minutes for Tanks and 10 minutes for Husk. If a human is hit by a grenade, they are instantly turned into a zombie. This is the only way to actively eliminate the Traitor.
    NEW RULE: While stunned, humans can stun zombies but not other humans.
  • Defence Survival - The three zombie upgrades of Infector, Tank and Husk are spread throughout three separated area, about 3-4m wide. Zombies can pick up the upgrades if they touch the desired upgrade inside the squares. If a zombie is stunned within a square, they must move outside of the square before counting down their stun. Zombies are only allowed one upgrade at a time.
    NEW RULE: One Tank shield was made available to the zombies from the start.
New/Infrequent:
  • Bounty Hunt - Three humans are designated as VIPs, known to all players, and allocated a particular zombie upgrade. If a VIP is tagged, their allocated zombie upgrade is made available. The game otherwise operates like a standard Survival round.
    NEW RULES: One Tank shield and Infector melee weapons were made available to the zombies from the start. The VIPs can only use a particular blaster that is given to them.
Zombie rules:
Zombies tag humans with their hands onto any body part, blaster, tactical gear, etc, turning the human into a zombie. If a human hits a zombie with a dart, the zombie is stunned for a count of 25.

There are 3 standard zombie upgrades/mutations/perks:
  • Infector - zombies get to use foam swords, pool noodles, etc. Tags with said foam melee weapons on humans count as regular tags. Said melee weapons can also be used to block darts. 
  • Tank - zombies get to use shields, which block darts. The shields cannot be used to tag humans, presumably as a precaution against shieldbashing which could cause significant injury. 
  • Husk - a zombie gets to use a ranged attack, in this case two Vortex Mega Howlers for two Husks. A ranged Husk attack counts as a regular zombie tag. The Husk may move from the place they were stunned to retrieve their ammo, but do not count down their stun timer until they return to their original stun place.
If in play, grenades can stun a zombie with a hit to a shield, and can be reused at will. If human vs human rules are in effect, a grenade hit to a human will turn that human into a zombie immediately. Furthermore, if a human is stunned by another human, they must drop any grenades they are carrying.

Blasters:
Since there were a lot of different blasters there, I've generalised them and only listed down the ones that I saw as significant or noteworthy, or remember for that matter. Being that I can't be everywhere at once, it's entirely possible I completely missed some blasters.
Regulars/Recurring: 


Elite Rapidstrike (various motors, LiPos) - typical high-ROF blaster at MHvZ. Can eat through a lot of ammo very quickly and easily without good trigger discipline, but can also hose down zombies very effectively.


Elite Stryfe (various motors, LiPos) - typical and highly popular all-round flywheeler at MHvZ. A little less ammo-hungry than Rapidstrikes, though can also easily eat through a lot of ammo with poor trigger discipline. There were several Stryfes equipped with full-auto kits, which behaved much like Rapidstrikes.
Elite Retaliator/Modulus Recon MkII (various springs, pump grips) - typical all-round springer at MHvZ. Very easy to build and quite effective in the right hands.
N-Strike/Elite Rayven (various motors, LiPos) - perform essentially the same as a Stryfe, solid all-round flywheelers. There are a couple of physical issues in the Rayven platform not present in the Stryfe that can significantly hinder performance and usability however. In particular, the very poor stock trigger mechanism and magwell-flywheel cage alignment issues.
N-Strike Modulus (assumed overhaul) - again, essentially the same as a Stryfe, just in a larger package.
N-Strike Vulcan (unknown mods, assumed overvolted) - as has been mentioned many times previously, a blaster that is more for looking cool and being fun than actual practical performance, at least in its current form. Without an extended belt, its capacity is not especially notable given the availability of Worker 22 dart mags, and its ROF is not impressive compared to full-auto flywheelers. Muzzle velocity is also somewhat lacking without a flywheel afterburner or similar technology.
ZS Sledgefire (various mods, usually singled and upgrade spring) - high power single shot springer. Effective at efficiently picking off single zombies at mid-to-long range, however quite ineffective in close range against multiple zombies due to its single shot nature.
(Assumed Elite)Alpha Trooper (assumed upgrade spring) - solid all-round springer with stock pump action. A little lacking in power compared to a Retaliator/Recon MkII, but quiite effective in HvZ nonetheless.

ZS Slingfire (upgrade spring) - notable for its one-handable prime with practice, allowing for somewhat effective on-the-run combat. Otherwise inferior to a Retaliator/Recon MkII/etc in most ways performance wise.

Doomlands Lawbringer (unknown mods if any) - reasonably high capacity one-handable revolver. Great for on-the-run combat against a couple of zombies, but struggles when faced with larger numbers.

New/Infrequent:
Buzz Bee Thermal Hunter (double spring, accepts Nerf mags) - gave this a shot during the first round. Even with just relatively weak double springs, it had more than enough power for HvZ combat. I however had a lot of jamming issues, which I believe is related to how I cut the shell to make it accept Nerf mags. I have done a little further trimming and sanding since, and I believe it is more reliable now, though it has not been combat-tested in its current state.
Buzz Bee Rail Raider (stock) - a fun but not very practical blaster. 6 darts is a not a lot of capacity especially given the blaster's size, and it's not the most reliable blaster either. Feeding can be finicky, and often results in blank shots if it is not loaded full with 6 darts. Nevertheless, it was very fun to use against lone zombies, and being able to load multiple darts into the same spot was also convenient for topping up after every engagement.
ZS Dreadbolt (stock) - a silly, poor performing, clunky, unnecessarily large blaster that uses an unusual ammo type. It has no practical benefit over just about any other blaster.
Rival Apollo (pump grip) - quite powerful for a stock blaster, and also has good accuracy up to around 15 metres. Rival balls lose speed very quickly however, and beyond that range become extremely floaty and slow. Capacity is also a little limited as the largest compatible Nerf Rival mag holds a mere 12 balls. I also personally find the pump stroke to be uncomfortably long and rough, though this may be more due to lack of experience with it.
Dart Zone Magnum Superdrum (stock) - a very good non-mag-fed stock blaster. A huge capacity of 40 darts, backed up with good power and ROF makes the Magnum Superdrum all round a very good blaster. It can hold its own against several zombies and can be topped off easily, however its biggest weakness is in reloading a lot of darts. In the absence of spare cylinders, which are more difficult to procure than Nerf mags (especially in Australia), reloading the Magnum can take quite a while. The cylinders are however quite large, so carrying multiple spare is more difficult than carrying a number of mags. Regardless, the Magnum Superdrum overall is possibly the best modern non-mag-fed stock blaster.


It was relatively cool on the day, not breaking 15 degrees Celsius. It was partly cloudy, with the sun often providing some warmth on the field if not blocked by the occasional cloud. Wind was a major factor, often picking up to significant speeds and throwing a lot of darts completely off their flight path. This often made longer ranged engagements difficult, if not near impossible, however had minimal impact on close range combat. We had a peak player count of around 35, a little lower than last months but still a very solid turnout.


As always, we started with a regular Survival round. I took along my Rail Raider and Thermal Hunter, using the Rail Raider for the first couple of minutes before Tank shields were made available. Against one or two zombies, it worked fine, needing only a few darts to stun each. The Rail Raider was easily topped up immediately after each skirmish. Once Tank shields were made available however, I made the decision to dump the Rail Raider, switching to my Thermal Hunter for more practical combat against Tanks. I encountered a number of jamming issues with it, which I believe are related to the cuts I made to the magwell not being deep enough, and my priming stroke being too fast for the already iffy feeding position. Nevertheless, I was able to survive for a reasonable time with it. A fair way into the game, a friend of mine was hurt, so I took their Stryfe for the rest of the game, dumping the Thermal Hunter. With it and my Sweet Revenges, I survived long enough to be the last survivor.

We then played two rounds of Secret VIP. In the first round, I was selected as the VIP. This round went quite well for the humans, and they were able to hold off the zombies very well, even with Tank shields and the Husk in play. In the late stages of the game, the General was tagged, revealing my identity to the zombies. However, as the Traitor was still in play, I withheld my identity from the rest of the humans. To maximise my chances of survival, I gravitated away from human-dense areas, and in particular avoided the Husk and tended away from Tanks. In the dying seconds of the game, the zombies shouted my identity to their Traitor, who was still as yet unrevealed. Distracted by one zombie charging at me, the Traitor also charged at me. I turned in time to stun them, however from their momentum made it within tagging distance of me, a good several metres away from where I had actually stunned them. While I had assumed that while stunned, the Traitor is a non-threat, this was apparently not the case as the stunned Traitor tagged me for a zombie victory with ~10 seconds left.

I am particularly annoyed with what happened at the end of the game, partly given that we lost with a mere 10 seconds to go, but primarily that we lost because of a detail that to me does not make sense, and has never been stated in the rules of the game when I have attended. Every other rule regarding human vs human combat is designed to render a human helpless against other humans, particularly with the latest addition. A stunned human must drop any grenades they are carrying (the only weapon usable by humans that eliminates other humans), and when stunned they can still fire their blasters, but can no longer stun other humans. Essentially then, a stunned human is completely helpless against any other humans - except the Traitor.

While stunned, the Traitor is still able to use their Traitor tag, which I of course found out to my own demise. To me this goes against everything else that has been established about HvH combat, and I think that the Traitor should not be treated any different. A Traitor being able to use their tag while stunned makes no sense as either a human or zombie. As a human, if stunned, they should not be an immediate threat to the human group, in line with everything else about HvH combat. As a zombie, they of course should not be able to tag as that goes directly against the point of zombie stuns. It is also extremely awkward if the Traitor was carrying the grenade. By HvH rules, they must drop the grenade, however by these rules, the first human to go and pick up the grenade is likely within tagging distance of the Traitor, thus is essentially guaranteed to be tagged. As with my other issues with this current ruling, this also makes no sense as there is no real way for the humans to safely get the grenade out of the Traitor's grasp, and there is very little way for the humans to ensure that the Traitor doesn't get the grenade. At very least, if no change is made, I believe it should be made clear in the rules that Traitors can still use their Traitor tag while stunned, as it is (to me) a counter-intuitive rule that could easily have a huge impact on the game, through no real fault of the human victim. 

The second round also went very well for the humans, with the zombies making relatively little progress in either game, even with Tanks and the Husk. Late in the game, the Traitor tagged out the General, revealing the VIP's identity to both sides. While this helped to focus zombie attacks, this also left them without a Traitor on the inside to help destabilise the humans. The human group held firm in the face of repeated Tank charges and Husk attacks, and were rewarded with an extremely dominant victory.

As we play more and more Secret VIP rounds, and as the human players get more used to dealing with Tanks and the claustrophobic conditions of the game, it becomes increasingly apparent how important the Traitor is for the zombies. In the first game, the Traitor was able to obtain the grenade, not only preventing the humans from using it, but also giving them essentially a second, ranged Traitor tag. This coupled with the General being tagged during the game gave the Traitor a reasonable opportuntiy to win the game for the zombies - which they did. With the General turned, the zombies know the identity of the VIP, after which it is simply a matter of conveying that to the Traitor to win the game. Thus while I still believe that we should have won that first game given what happened at the end of the game, the Traitor put the zombies in a fairly good position considering their lack of numbers, and to be honest I would have been far less annoyed if they'd just tagged me at range with the grenade.
In the second game however, the Traitor elected to simply take out the General, which as I've mentioned many times before, I do not consider to be on its own a particularly effective or reliable tactic. While this does give the zombies a particular human to target, it also removes the zombies' most reliable human disruptor. This tactic is perfectly viable and effective if the zombies have been able to do reasonable damage to the human group already, however is risky at best if not. If the zombies have not already been able to make much headway into the human defences, determining the VIP's identity is not going to help much. It's not much use knowing who your target is if you can't get to them anyway. In situations like these, it is much more effective for the Traitor to find a position from which they can fire on much of the human group, and let loose just before another zombie charge. The subsequent chaos and stunned humans gives a struggling zombie group their best chance at breaking through and gaining an advantage. While Traitor - zombie communications can be a little difficult to establish, a coordinated Traitor attack and zombie charge can do massive damage to human groups, and I have seen easy human wins turned into crushing defeats when this tactic is executed well.

After Secret VIP, we took a break for lunch. After lunch, we played a round of Defence Survival. Unlike previous Defence Survival rounds, the zombies were given a Tank shield as well as some melee weapons from the start. This can greatly reduce the amount of time necessary for the zombies to get some momentum. In typical Defence Survival, the zombies spend the majority of their early game standing on the borders of the Defence areas, hoping to catch the defending humans off guard and grabbing an upgrade. With a Tank shield already in play, the starting zombies not only have much better opportunities to grab other upgrades, but also much better ability to get some early tags. I think that allowing the zombies a starter shield is a good idea to help speed up games a little, as Defence Survival can drag on for a really long time if the humans stay vigilant.

I actually didn't get to play for much of the game. While near some other humans guarding a Defence area, I heard a zombie running at me from about 5 o' clock, so I quickly turned to engage, firing off several darts and stunning them. The human next to me also turned to engage, however held their blaster at just the right position and turned just far enough to hit me in the side of the head with their blaster. Thankfully the injury wasn't serious, but it was sore for a time and did bleed a little bit. I also sat out the next round, which I believe was a 6 Mag Survival.

I was feeling better in time for the last round, a game of Bounty Hunt. This time around, the zombies were given a Tank shield to start with instead of having a Traitor. The VIPs were allocated to the remaining Tank shield and the two Husks. The VIP allocated the other Tank shield was given a Buzz Bee Flintlock pistol, while the Husk VIPs were given Dreadbolts.

I think this round of Bounty Hunt went quite well. With the Tank shield, the zombies start with much more ability to harass the humans, removing the concern I had previously with this gametype. The zombies still need to tag the VIPs to get access to their full upgrade arsenal of course, however are in a much better position than with no upgrades whatsoever.The blaster allocations also helped substantially with VIP identification and the game dynamic in general. Since the blasters are deliberately poor in combat, a VIP on their own will struggle to defend themselves against more than one or two zombies. With a Tank also in play from the start, VIPs are very vulnerable if not protected. This not only gives the humans much more incentive to help defend the VIPs, but also makes VIP tags much easier to achieve if the zombies can separate them from the other humans.

In the round we played, the zombies initially focused on the other Tank VIP and their group of defending humans. They were able to break through human defences and achieve the tag, partly through drawing human attention in multiple directions, but also by using their starting Tank shield to good effect. The majority of the game played out much like a regular Survival, with the main exception of the zombies being more target-focused. I believe this works well as a variant of Survival that still plays essentially like a regular Survival. The addition of a Tank shield from the start of the game helps to balance out the other Tank shield not necessarily being made available, and helps to reduce the how long the game can drag out for.

I think giving the zombies a Tank shield at the start of the game is a good way to speed up the game, or give the zombies an advantage if necessary. As mentioned previously, Secret VIP has turned from a near guaranteed zombie victory when it was first introduced into a zombie struggle as it is now. In the past couple of events, barring a very poorly organised human team, the zombies have struggled to make as much impact as they used to be able to. I believe this is partly due to the increasing total player count giving the humans progressively more firepower to use, as well as more and more players learning and becoming more experienced. There is also a possibility of the chosen Traitors being less effective than past Traitors have been, as many of the games that have been decisive victories for the zombies had previously looked good for the humans. Having a Tank shield available to the zombies from the start may make Secret VIP more competitive without the zombies having to rely on the Traitor.


I had a lot of fun this event, barring my unfortunate injury incident and my annoyance at that Secret VIP round. I quite liked the changes made to the gametypes this time around, and would be fine seeeing them become part of the standard rules.
 
A link to the same post on BlasterHub: link
Viewing all 347 articles
Browse latest View live